I’ve been living in my pajamas for over a week, I ate and drank too much between Christmas and New Year’s and only exercised once. I slept in late and spent time with favorite cousins, we played games and laughed, and it was just what I needed to end a really good year.
2015 was good for me, it was last year that I found something that I’d been chasing in my personal life: real balance. I’ll write up a more detailed post on it soon, but I will say this, most of what gave me balance came from first making an active lifestyle a priority. So much goodness stems from taking care of your body and this year I’m repeating the habits I maintained in 2015, so this morning it was back to a regular exercise routine and the fitness kickboxing classes I love so much.
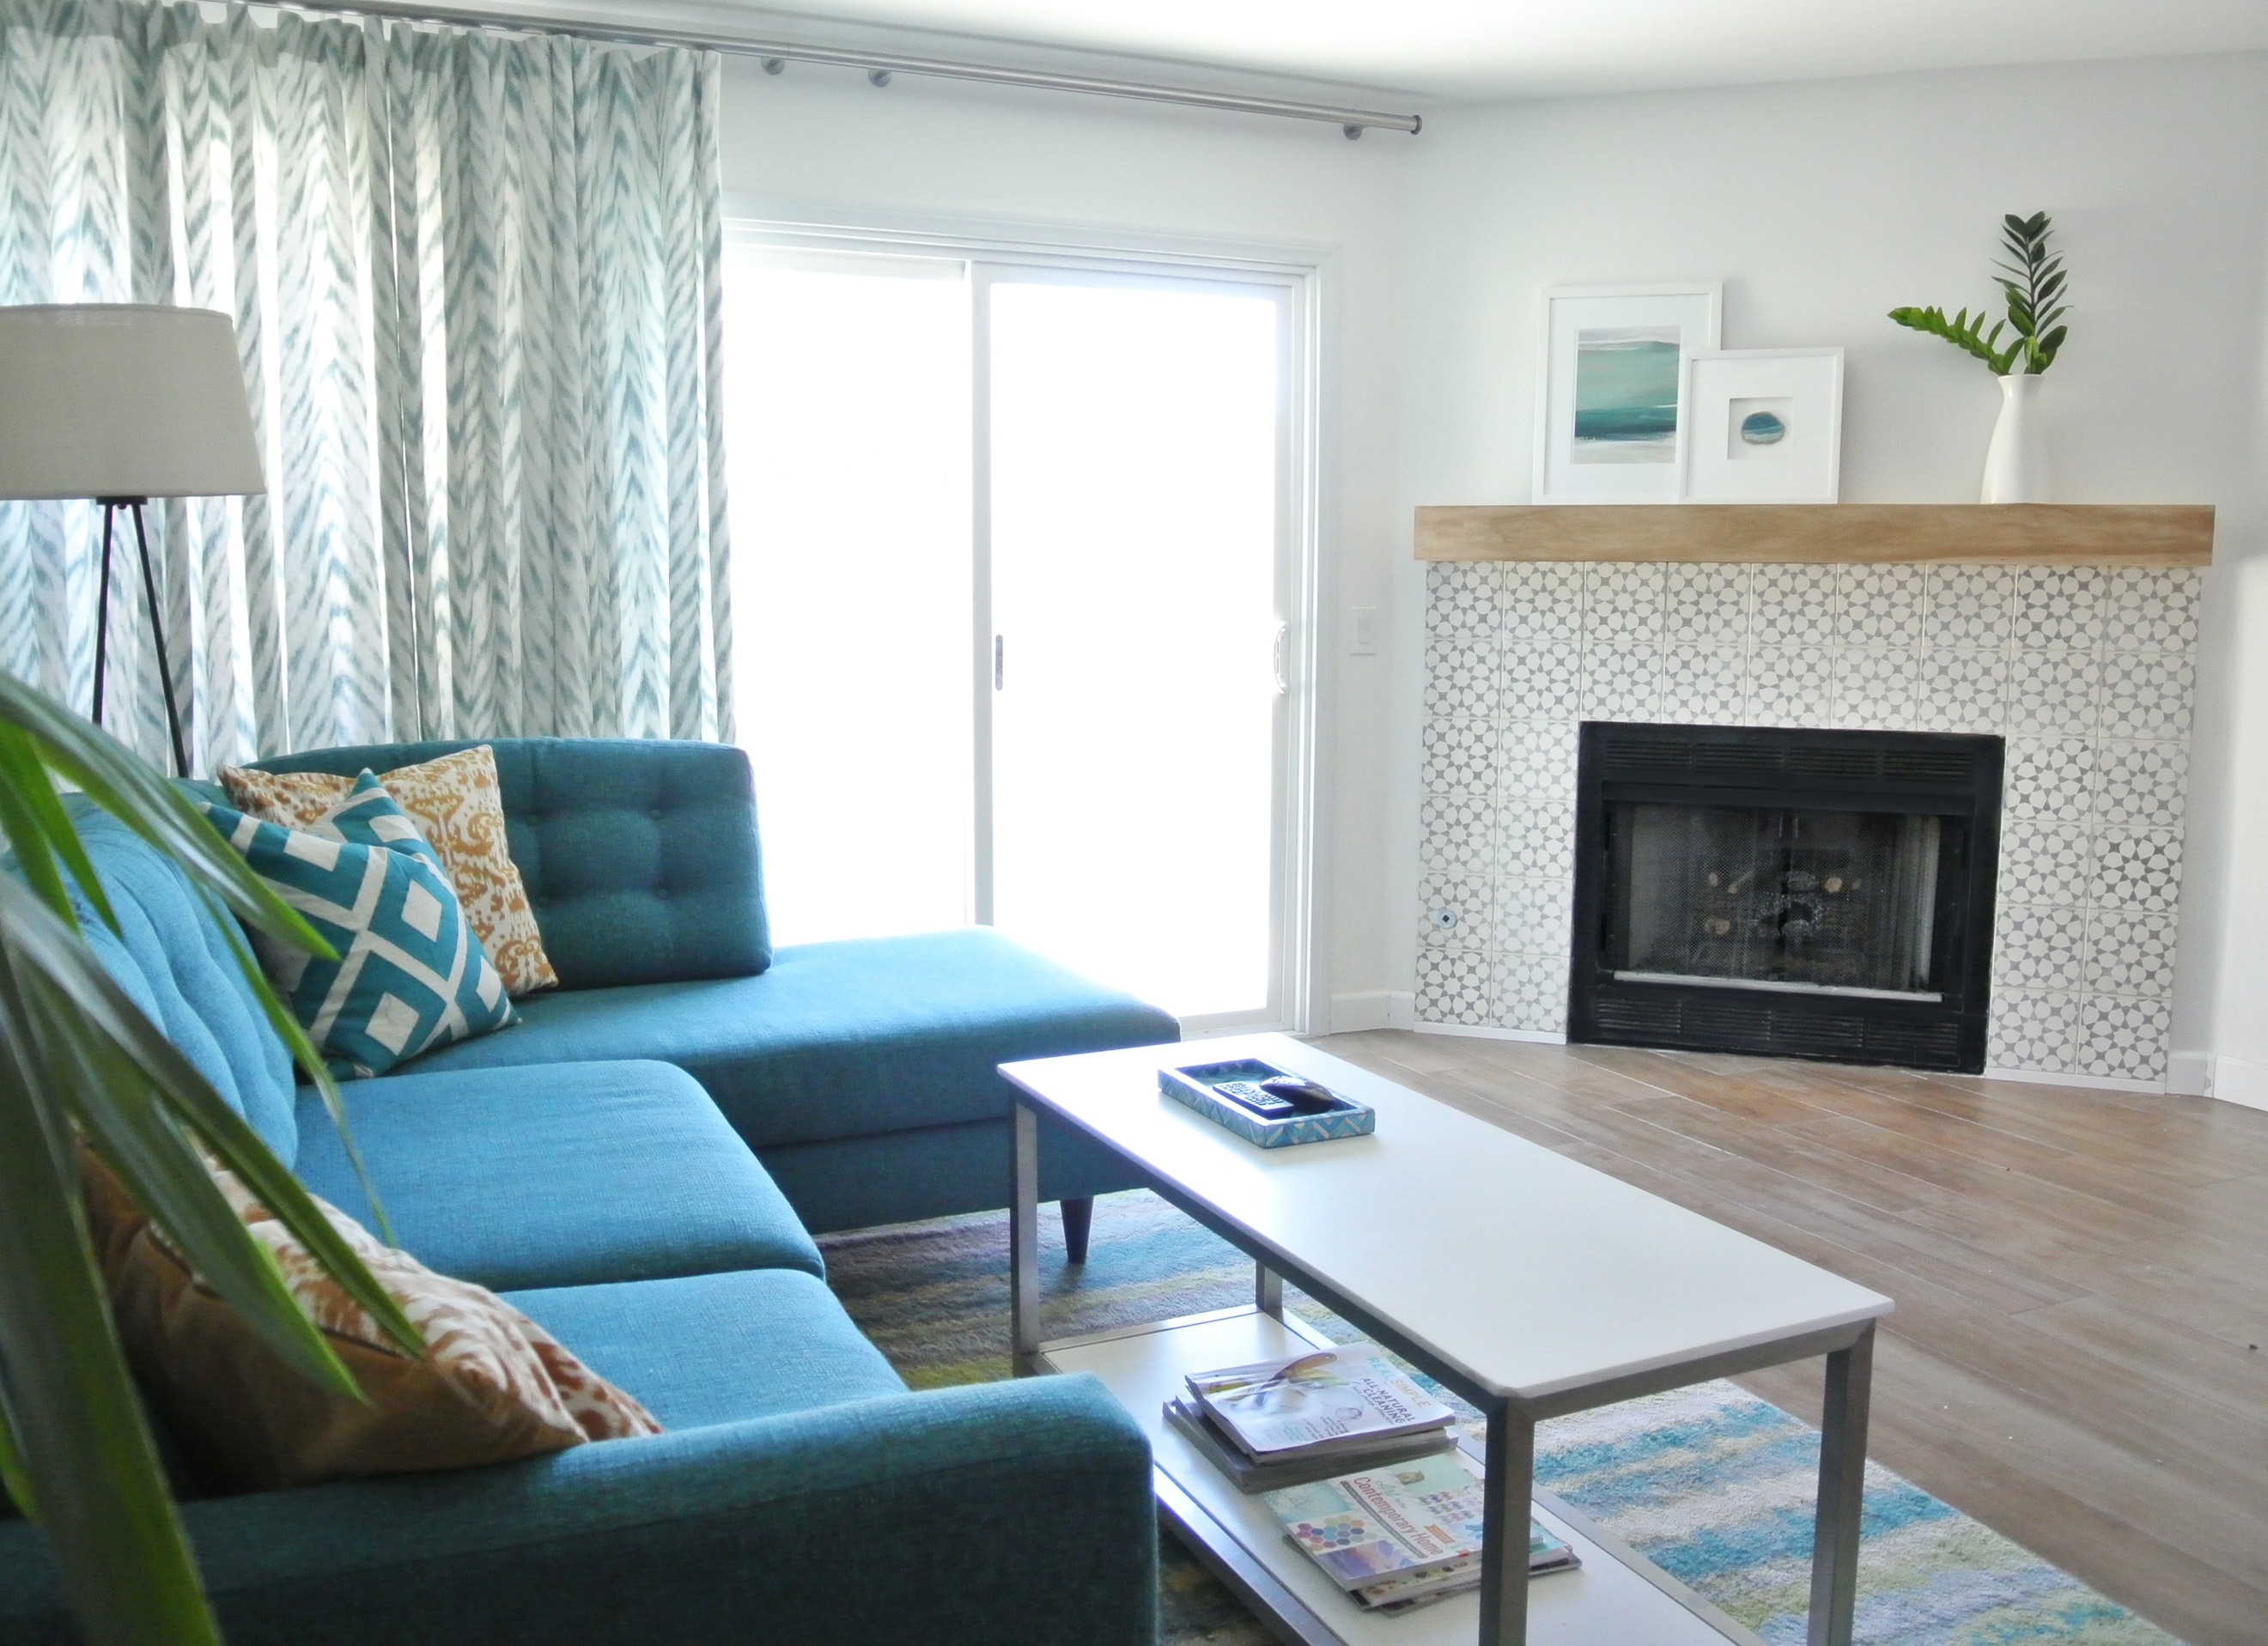
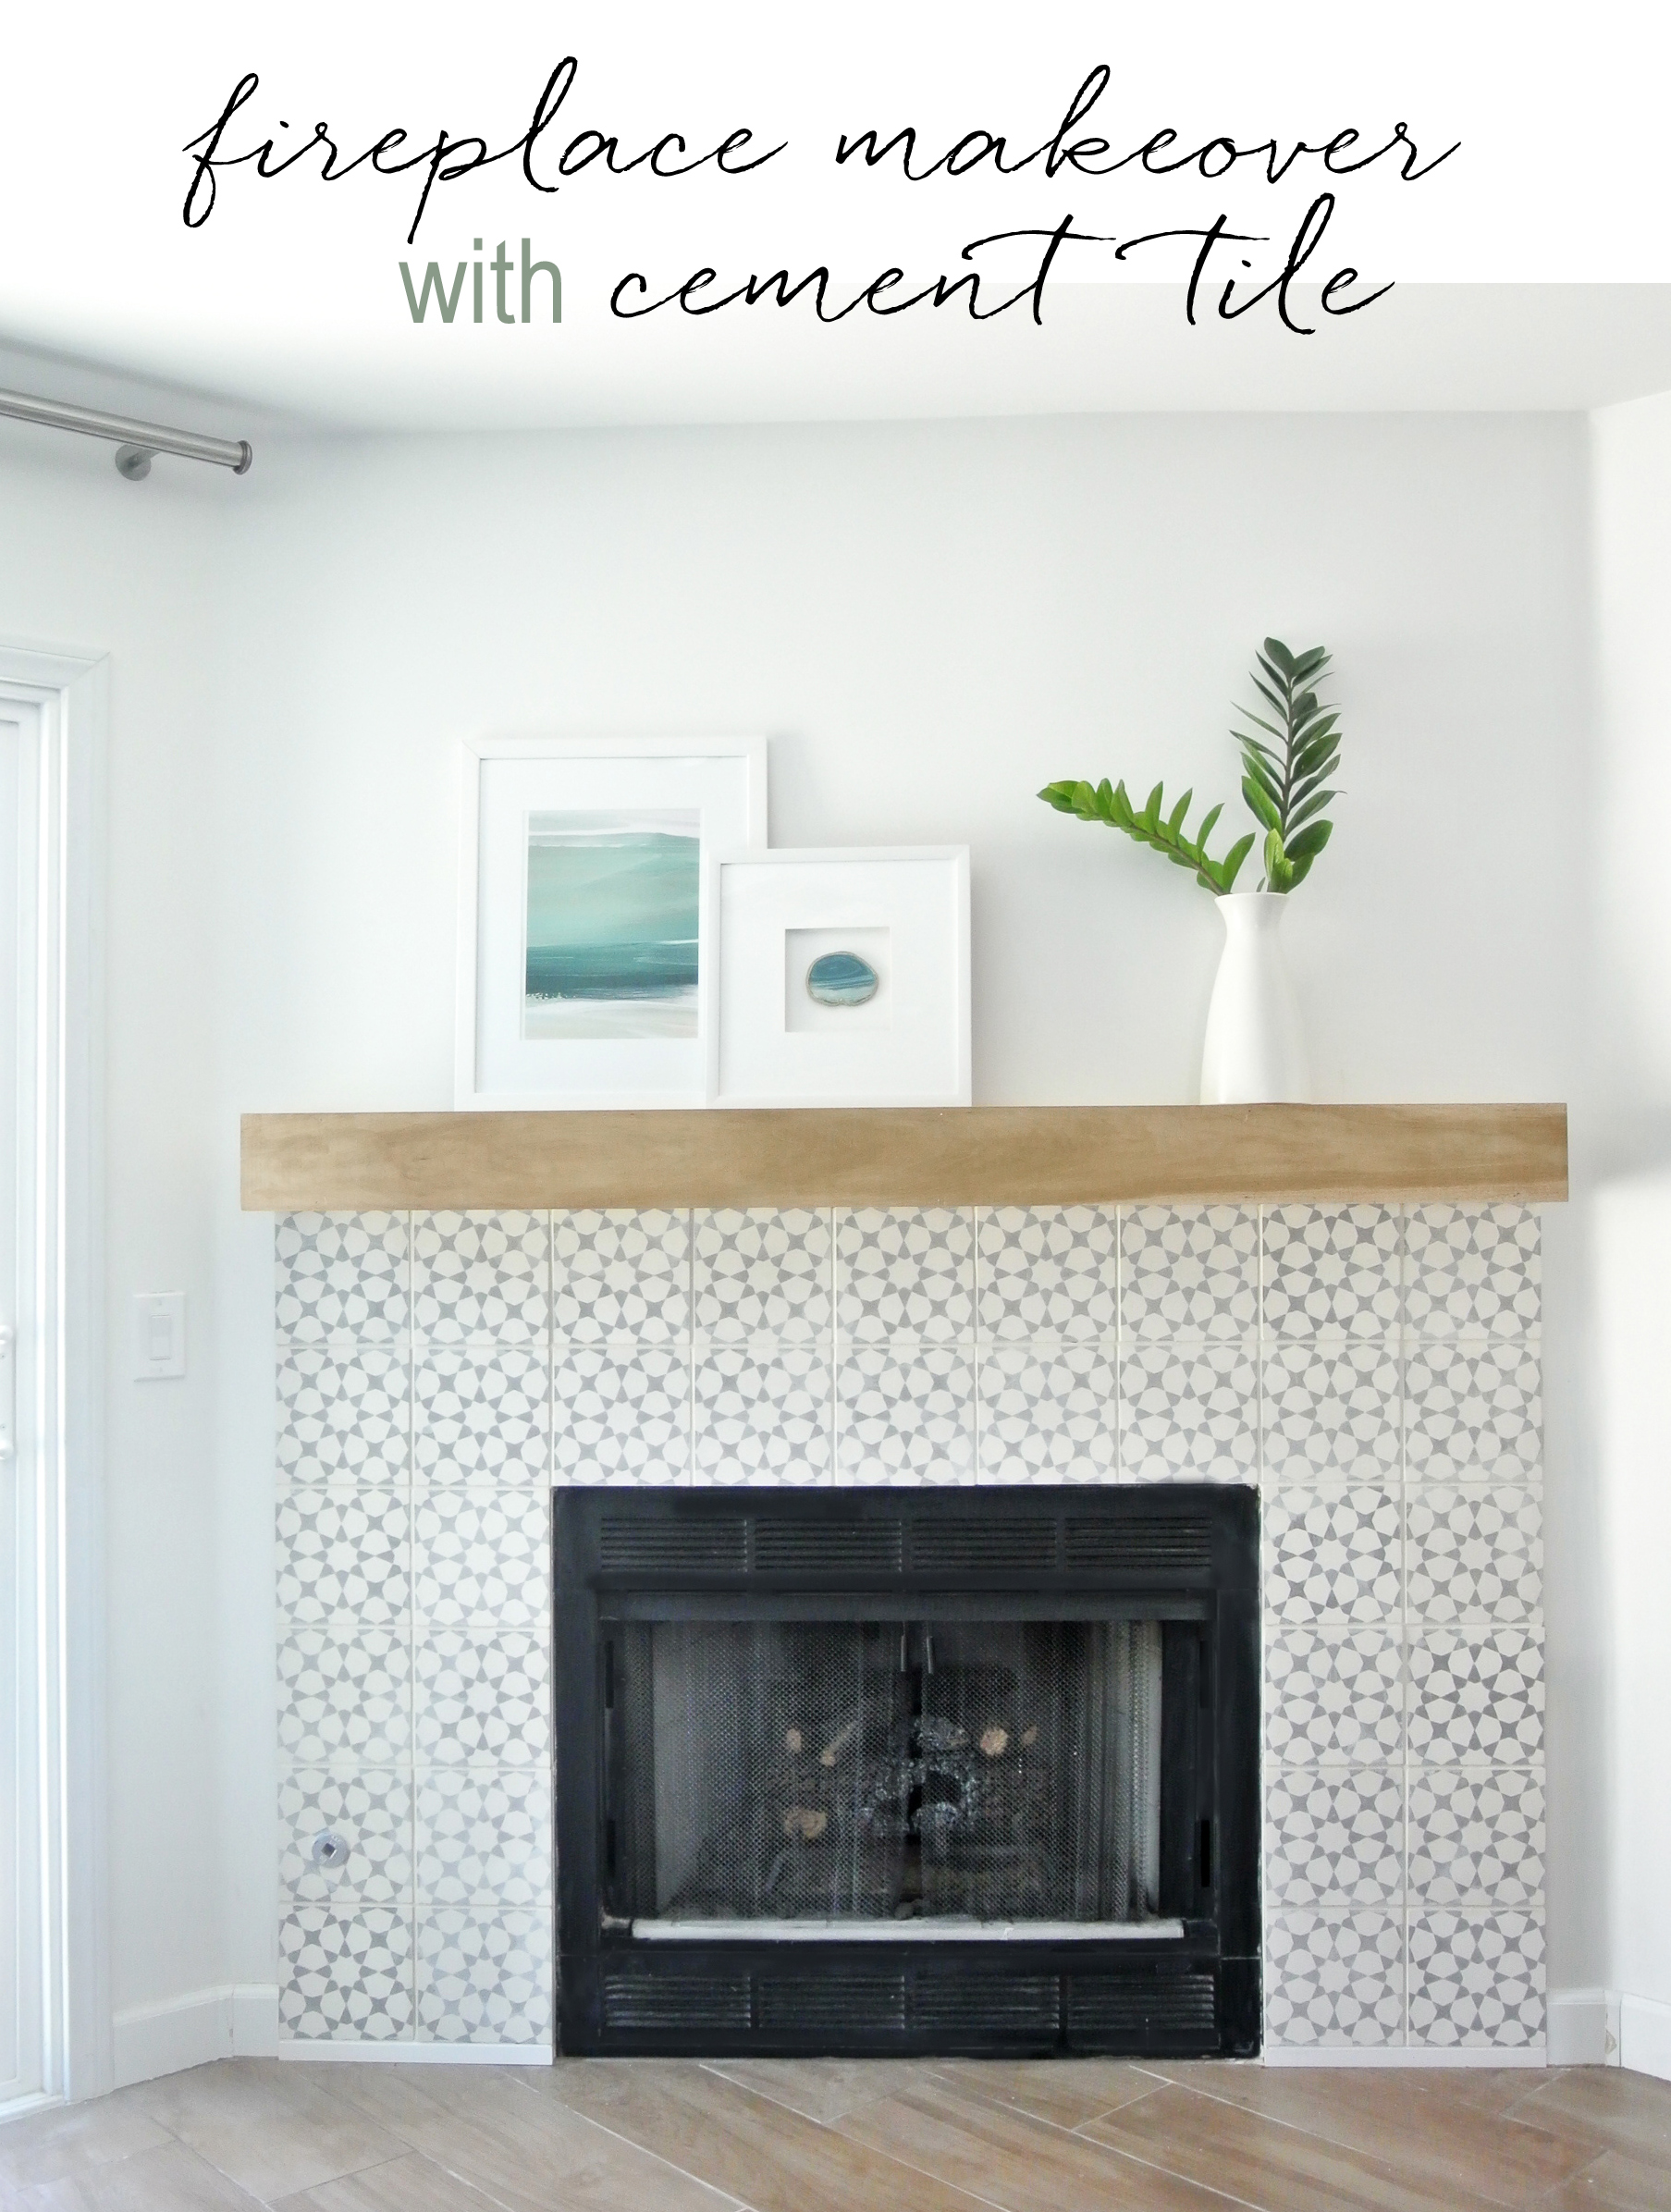
Anyhoo. I spent last week in Las Vegas at the home we remodeled and finished up one last project so the home is at last ready to rent. We’re moving on to another house project soon so the plan is to move the furniture out and rent the refurbished home to a tenant long term. The final project that remained was to add tile and a mantel to the fireplace and I’m very pleased with the result!
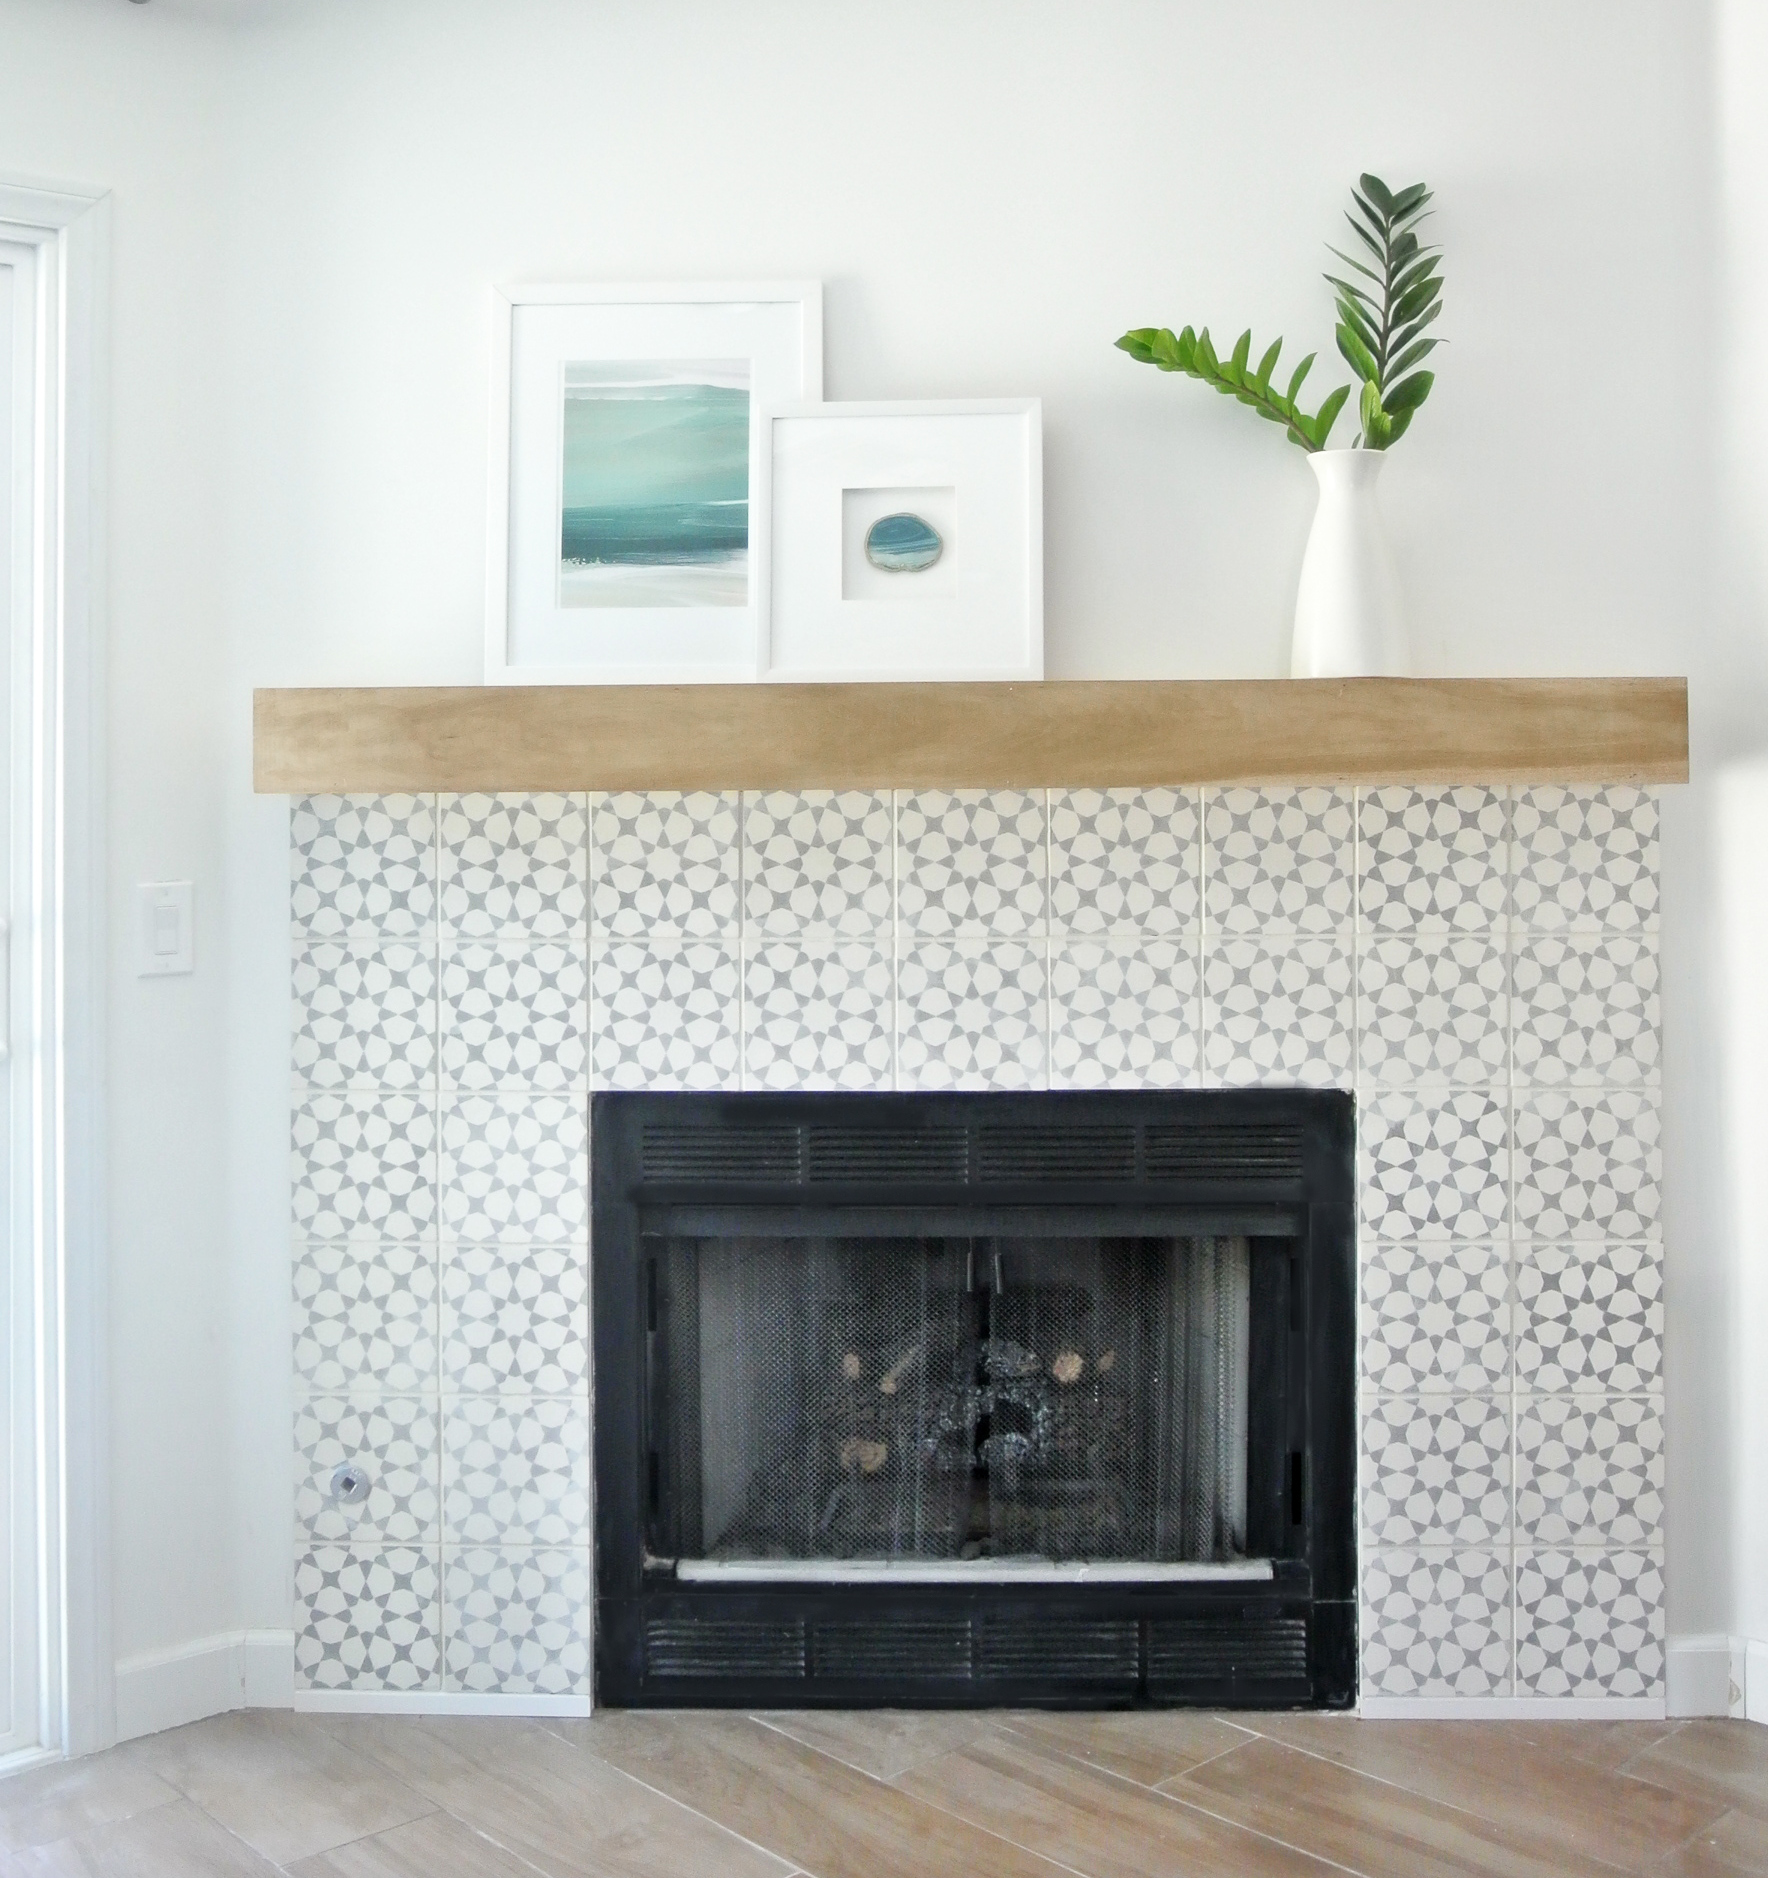
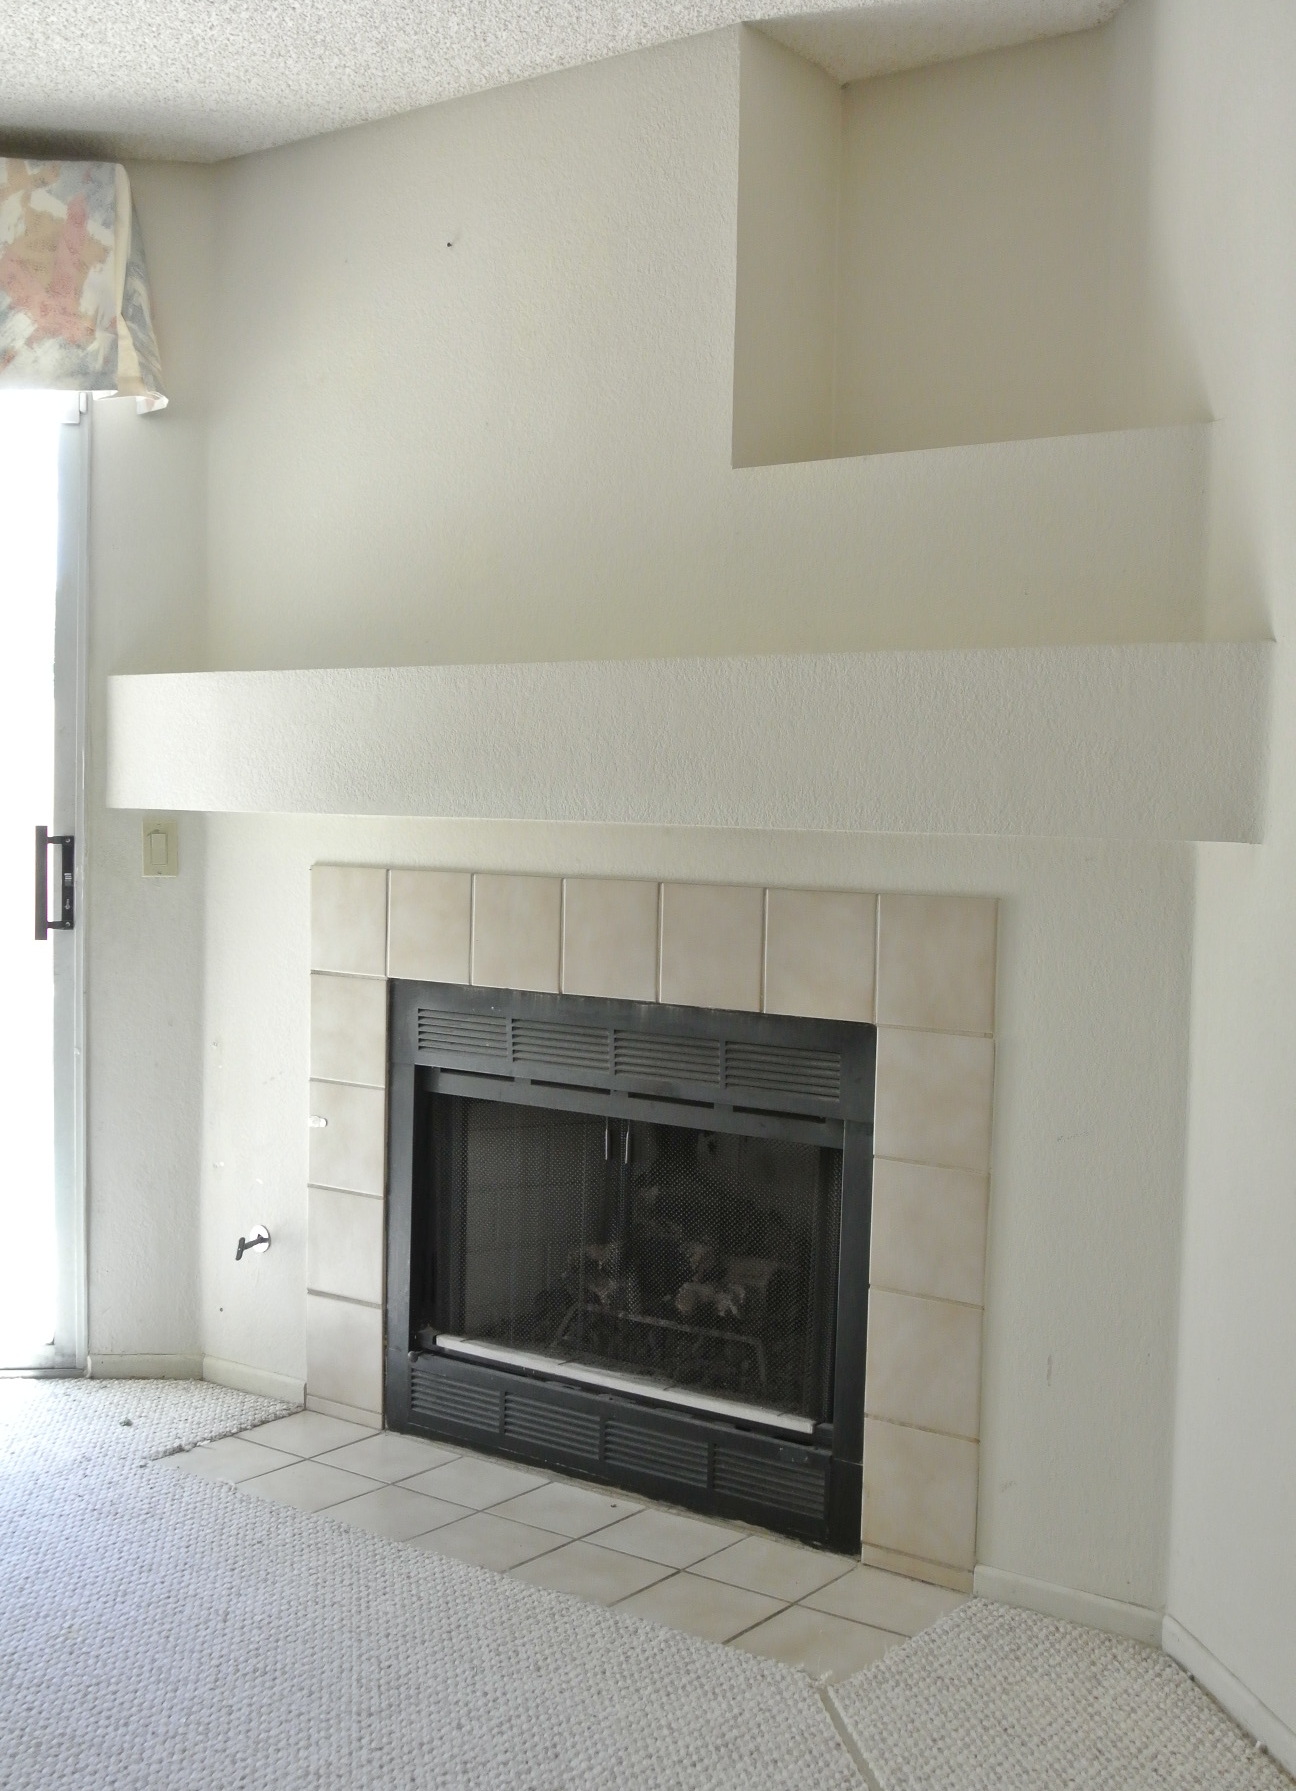
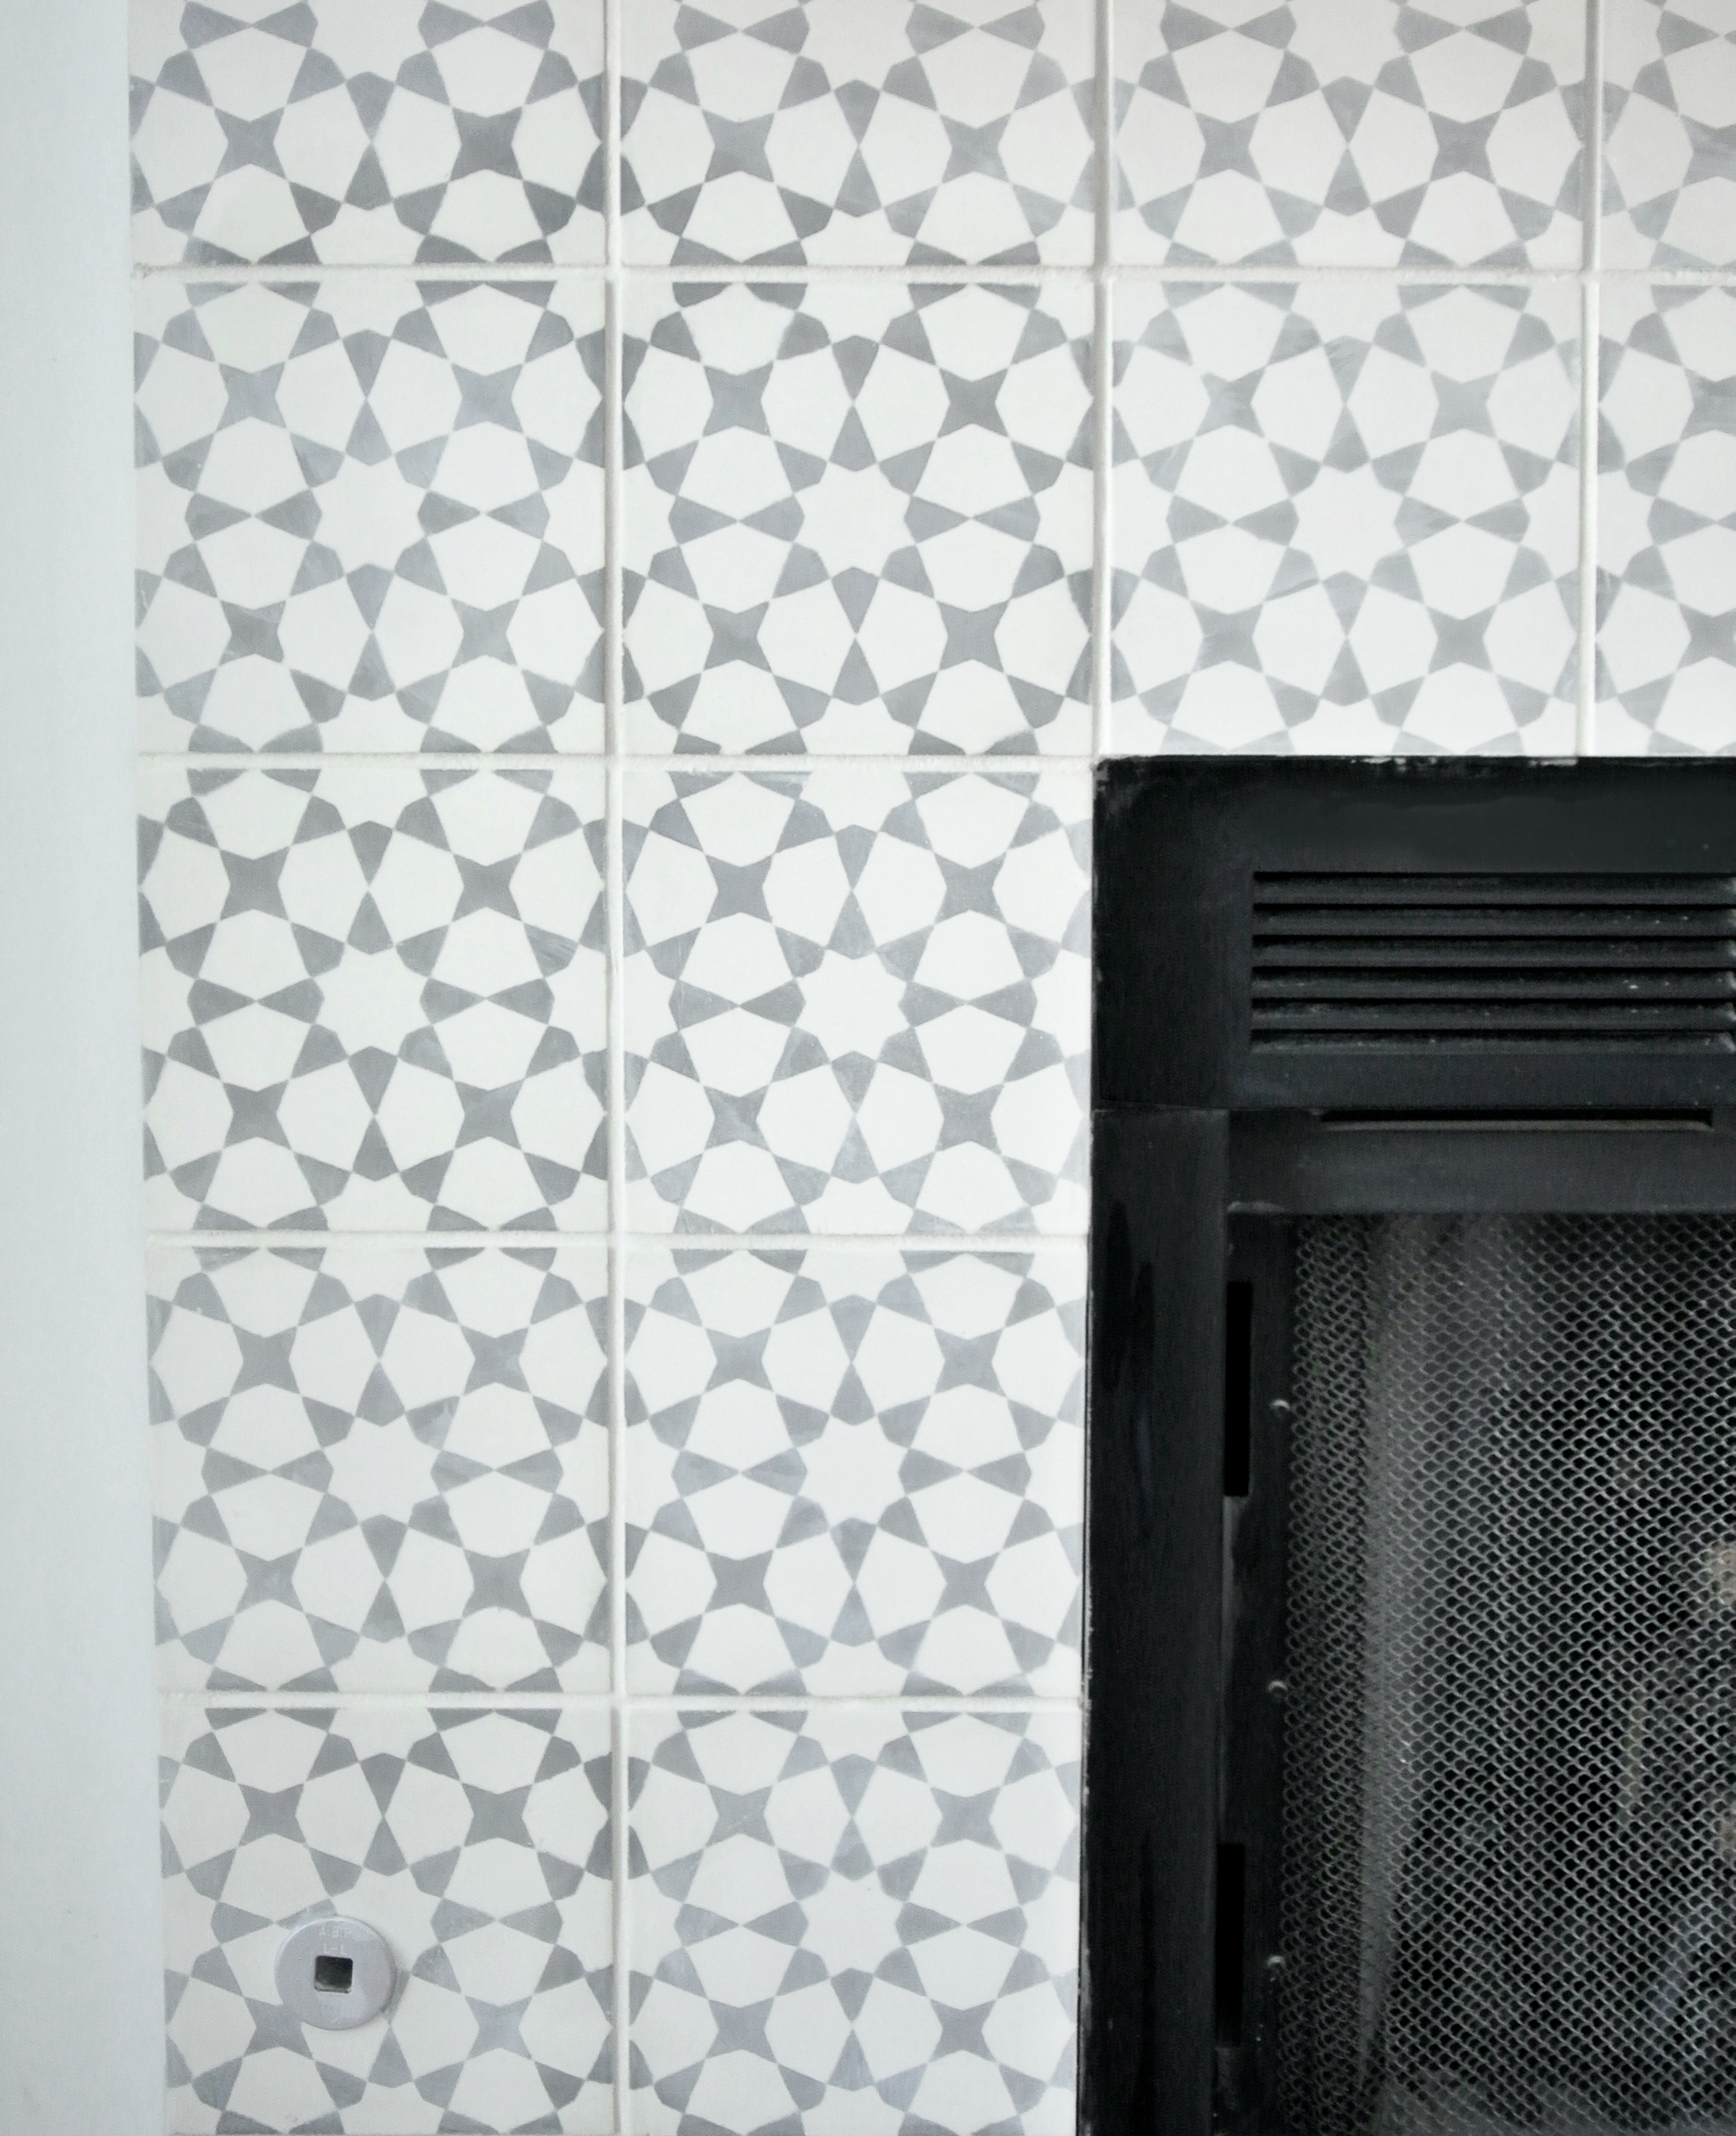
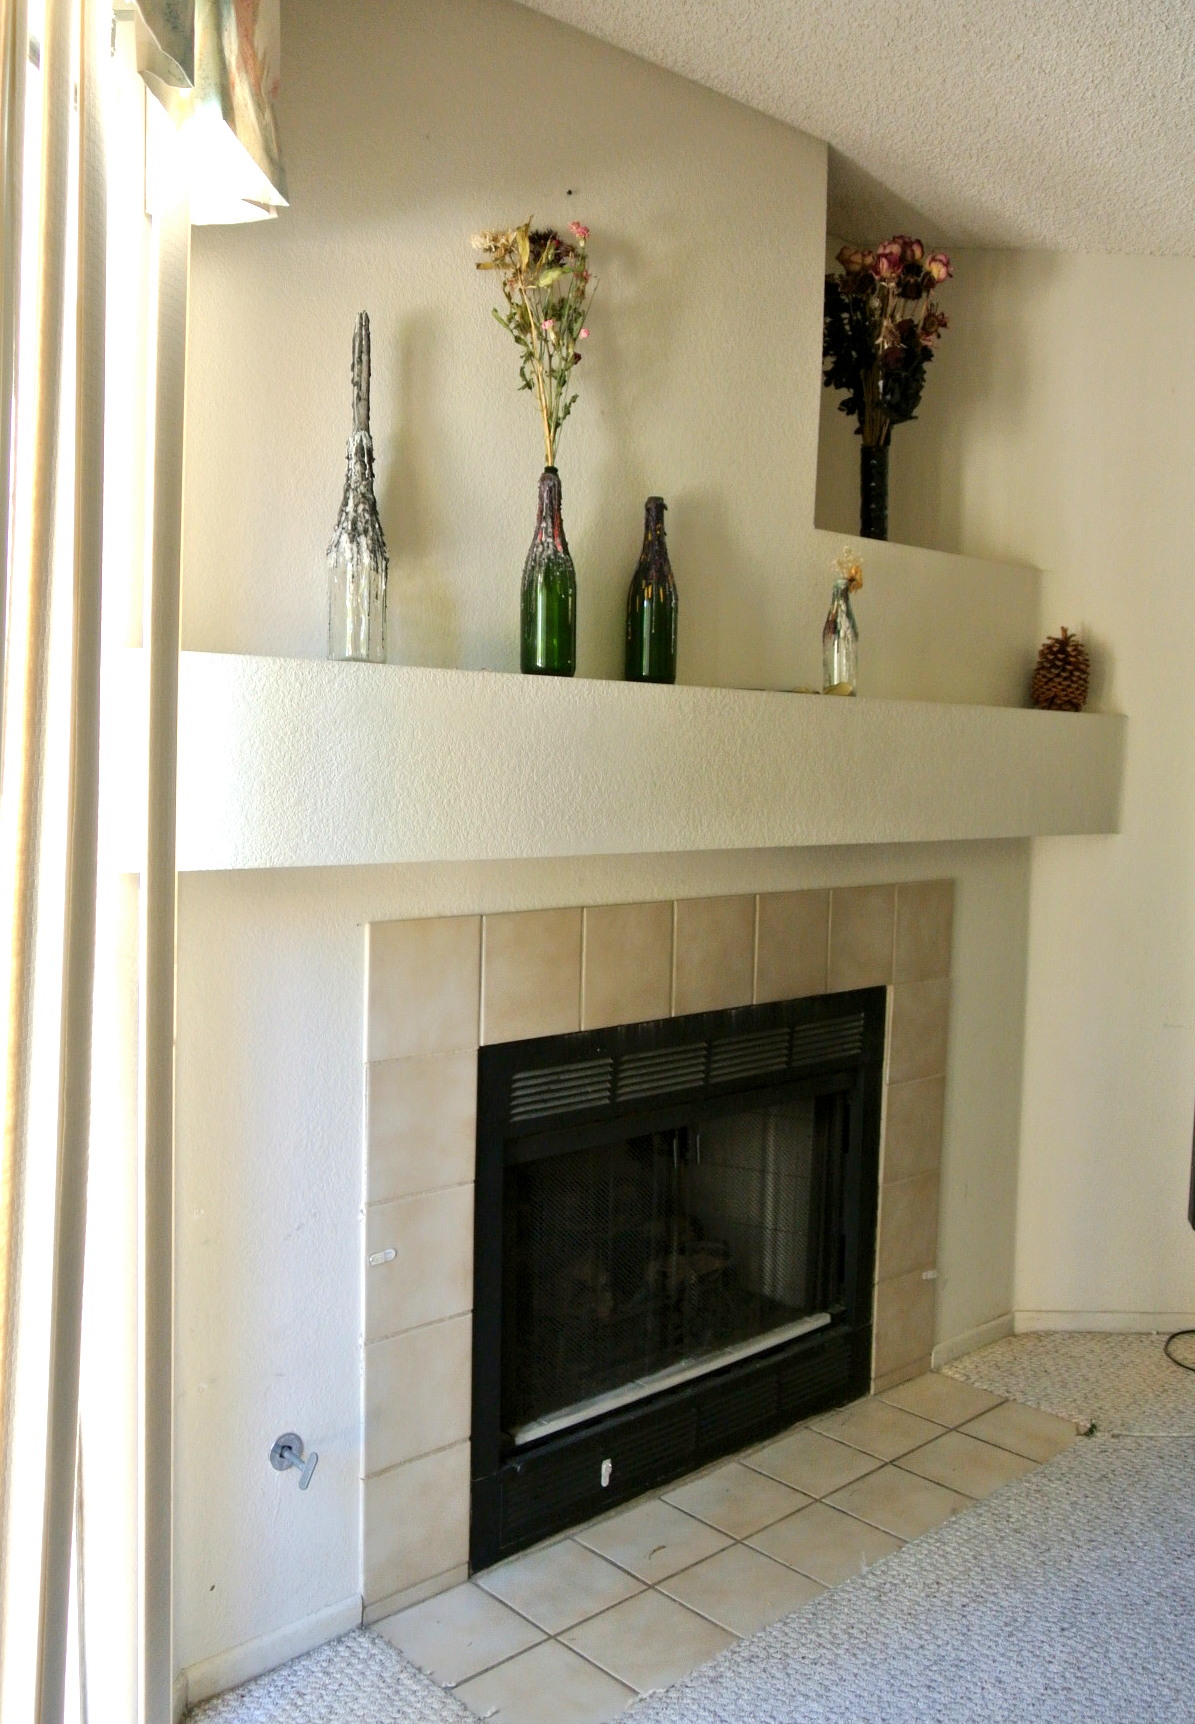
I’ve longed to work with patterned cement tile, I had thought my first use of it would be a bathroom floor but it turns out that it was the perfect size and pattern for a dramatic fireplace focal point. Let’s go back in time, let me remind you of what I started with many moons ago, this was the dated corner fireplace that existed when we bought the house, note the odd niche and boring tile.
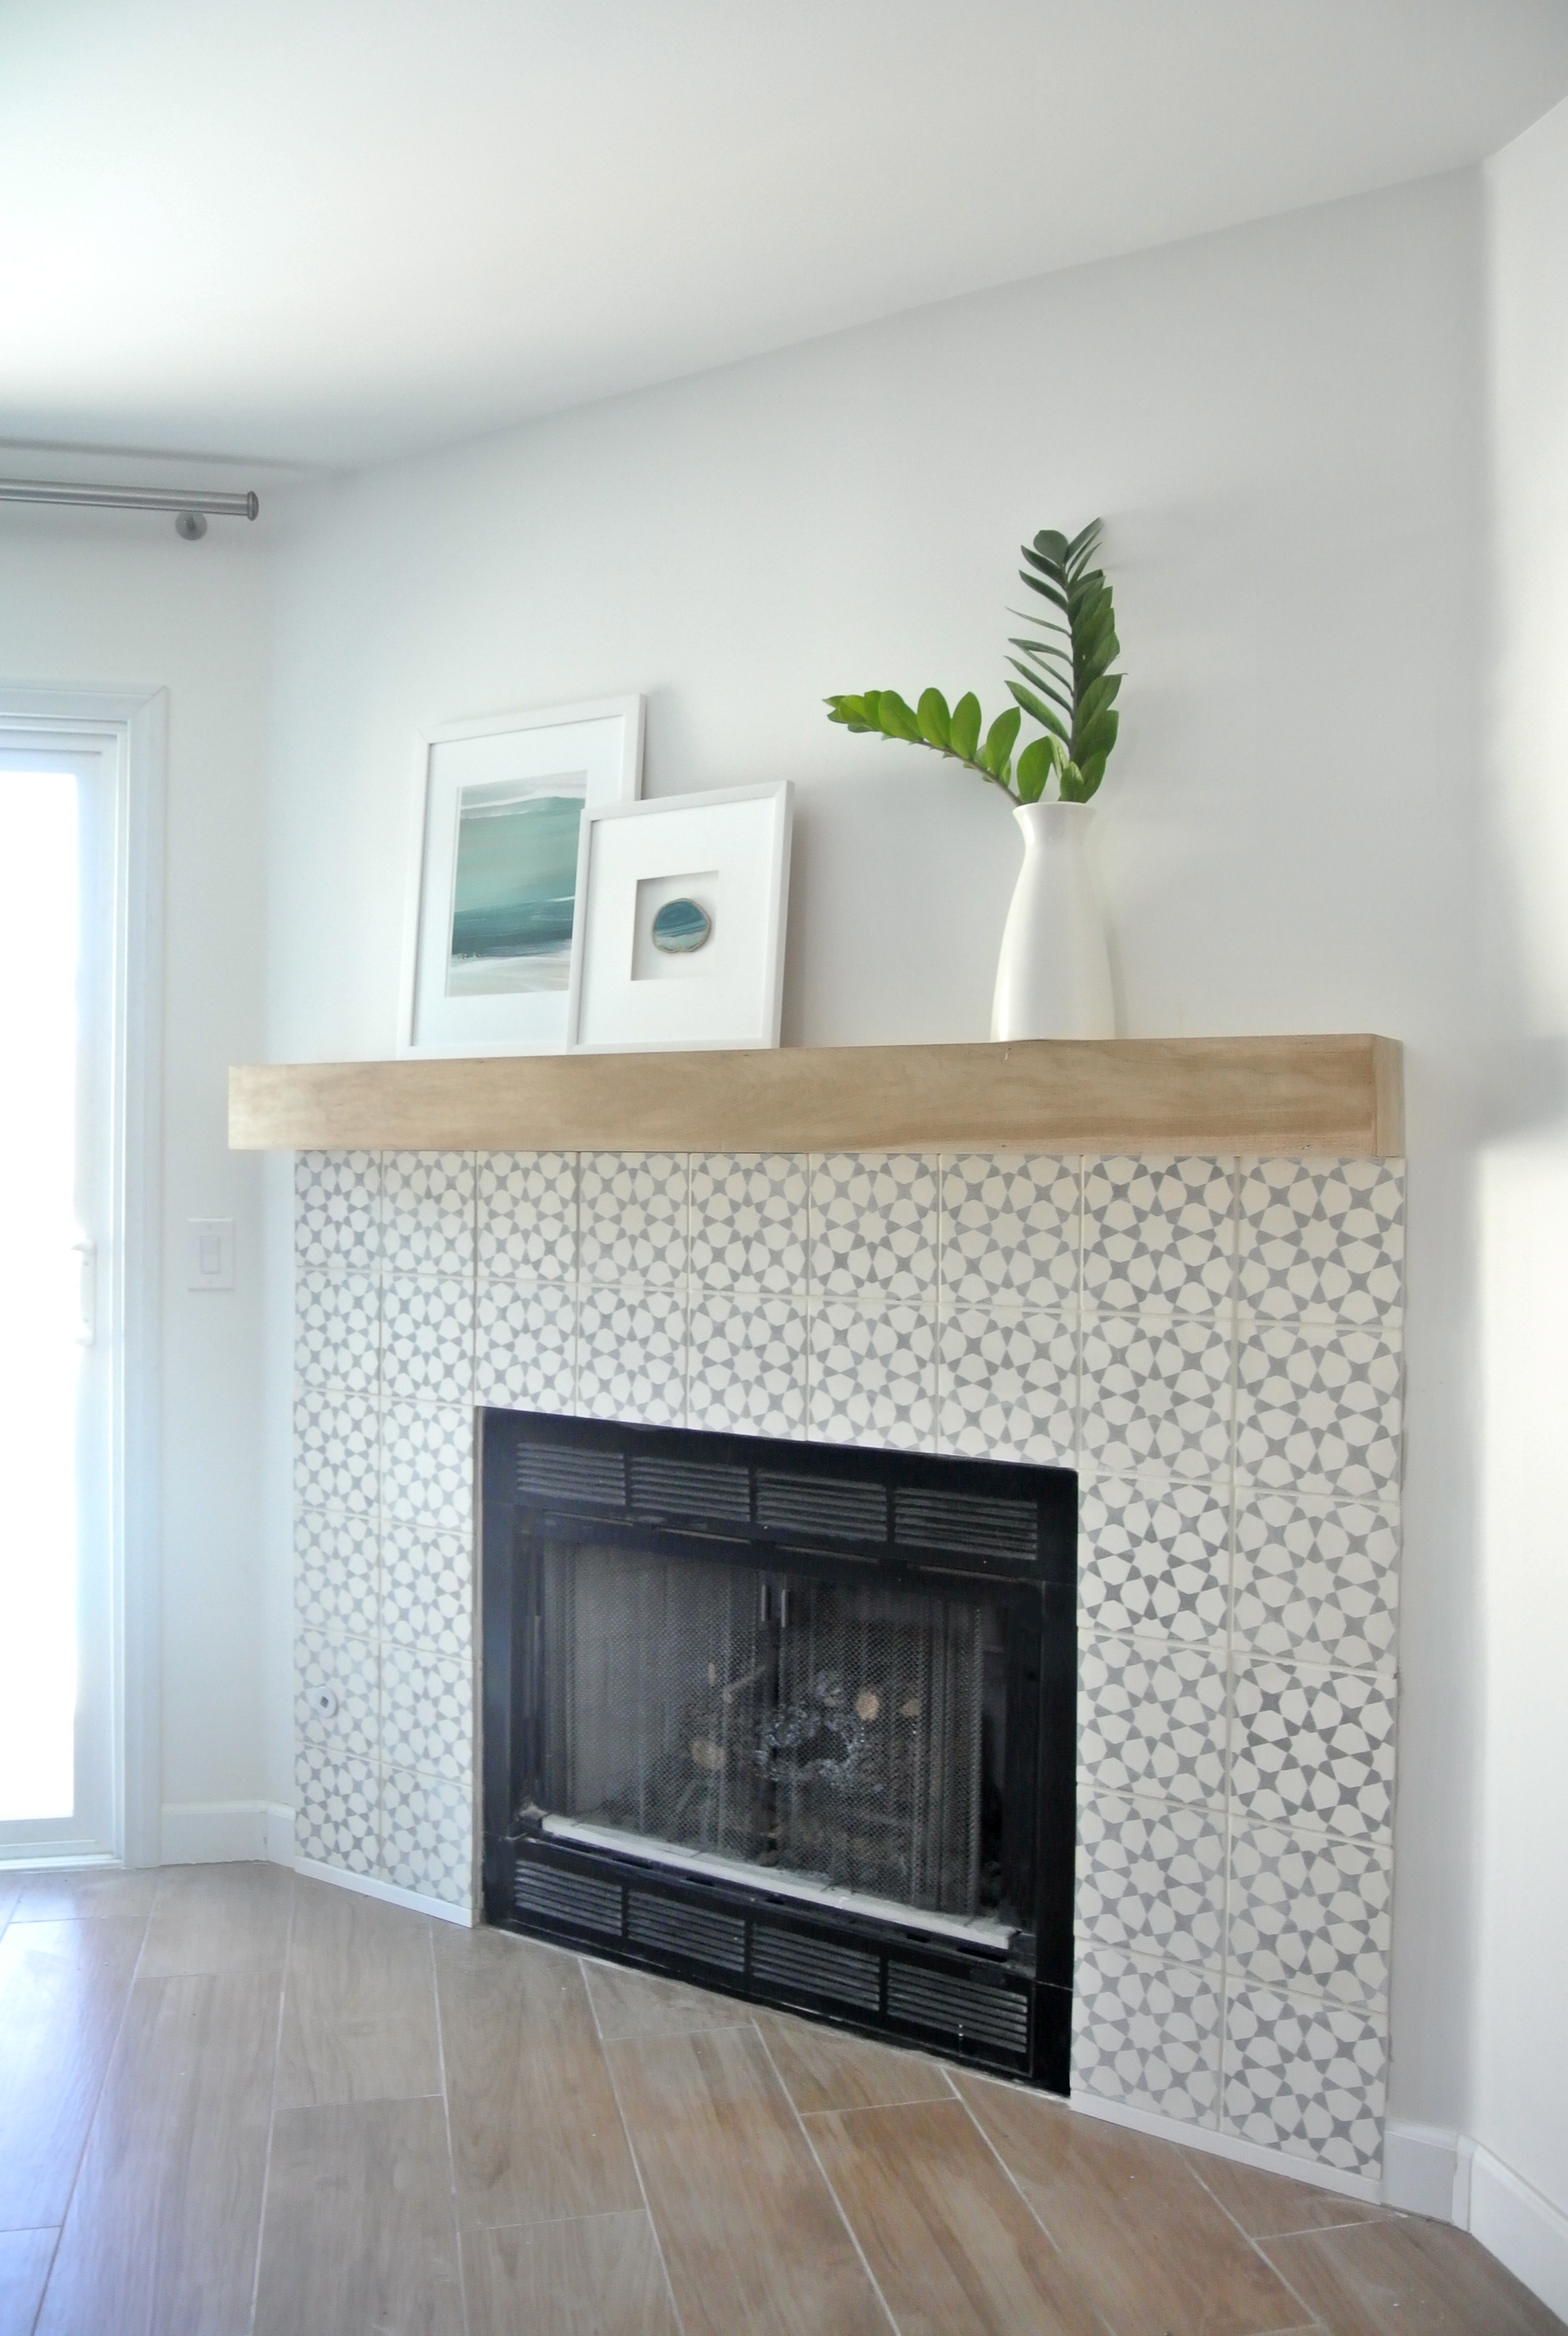
Today it’s a has a more modern look, after filling the niche and removing the drywall mantel, I tiled and grouted and Matt built a new wood mantel.
I could have chosen something basic but I couldn’t get this inspiration image out of my head and wanted to create a similar look. The gray and off white cement tile is from from Overstock, it’s a beautiful Moroccan inspired pattern that dresses up the room.
Three boxes arrived in perfect condition with no broken tiles, I was impressed. I didn’t order extra this time since they come in boxes of 12 and I only needed 34 tiles – I didn’t want to spend the extra 100 bucks, so I got lucky.
I had to map it out very carefully, the tiles are 8 x 8” and the width of the fireplace box is 41” so I did the math and figured out I could get 5 tiles along the top with ¼ inch spacers and the vertical tiles lined up really nicely too. 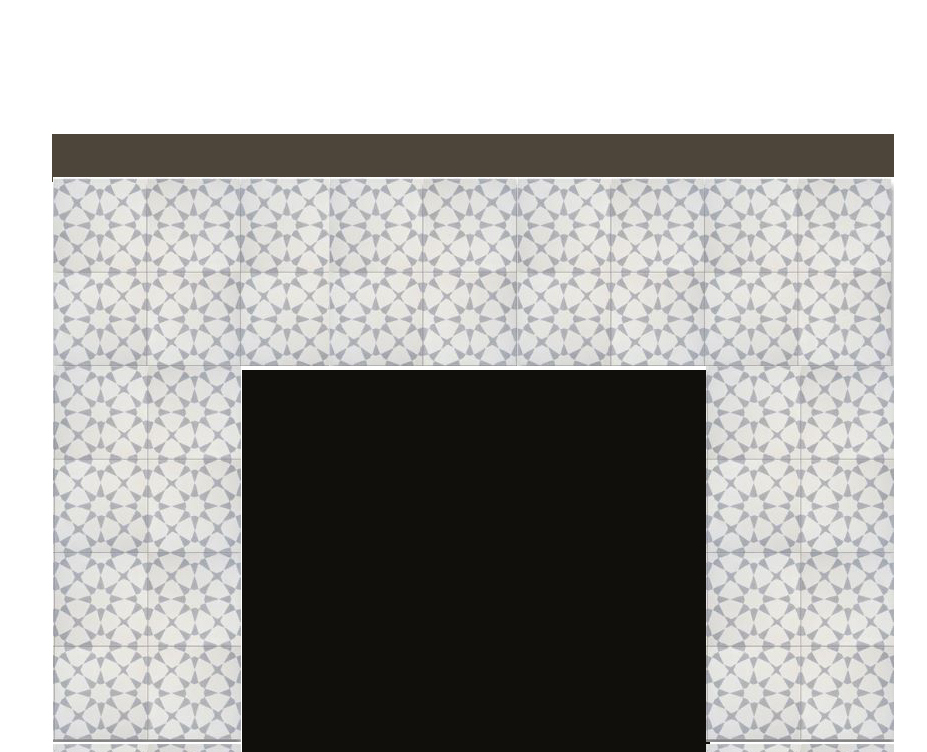
The first complication we had to deal with was the gas line cap – it required a hole in one of the tiles. Matt purchased a really handy drill bit kit that did the trick. It’s a wet diamond hole saw that worked perfectly! I’m holding the metal cap that attaches to the gas line, you can see the hole saw was the perfect size for making the circular cut.
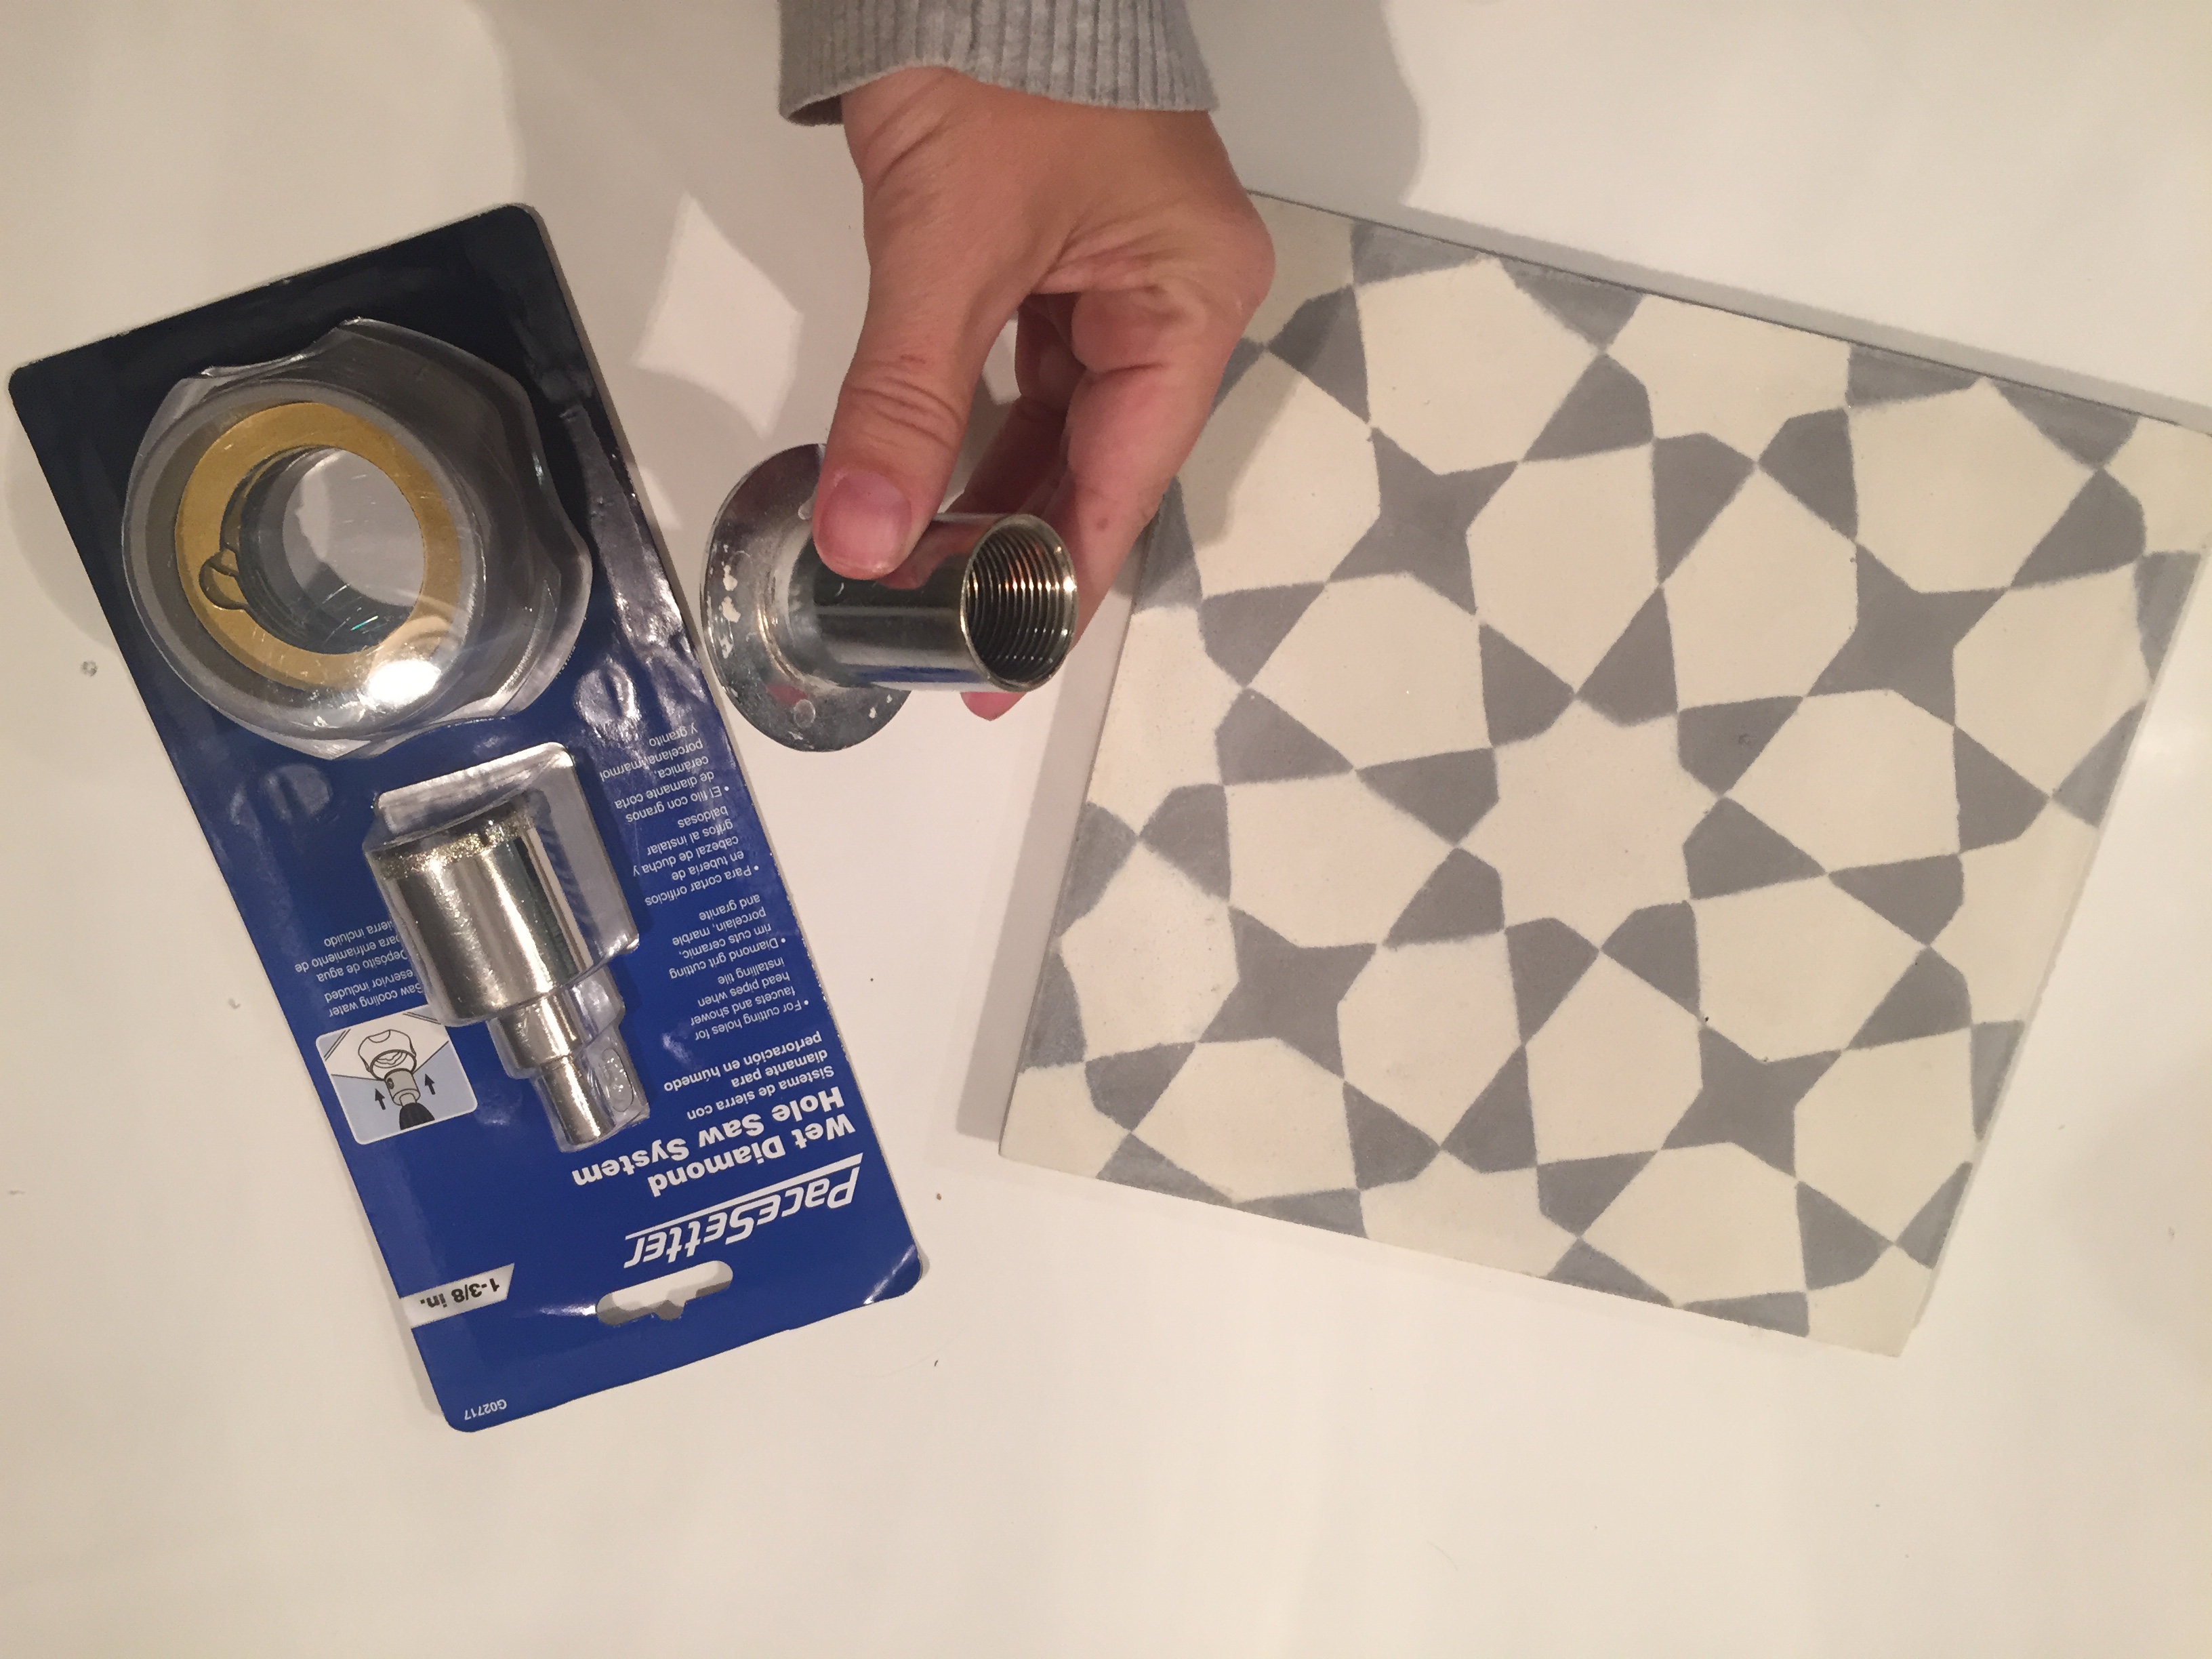
It has an adhesive rubber seal so you can create a mini water reservoir, then the diamond tip cuts the hole, this wet diamond saw is really great for cutting holes in tile for plumbing fixtures in showers.

The tile is very heavy so I had to use strong adhesive and in a thick layer applied with a trowel. (Hidden by my elbow is where the gas line cap is – see image below). I had already mapped it out on the wall and knew there was a small gap on the bottom so I placed a wood support there to support the tile and worked my way up the wall on each side during Downton Abbey reruns. SO excited Season 6 is finally here!
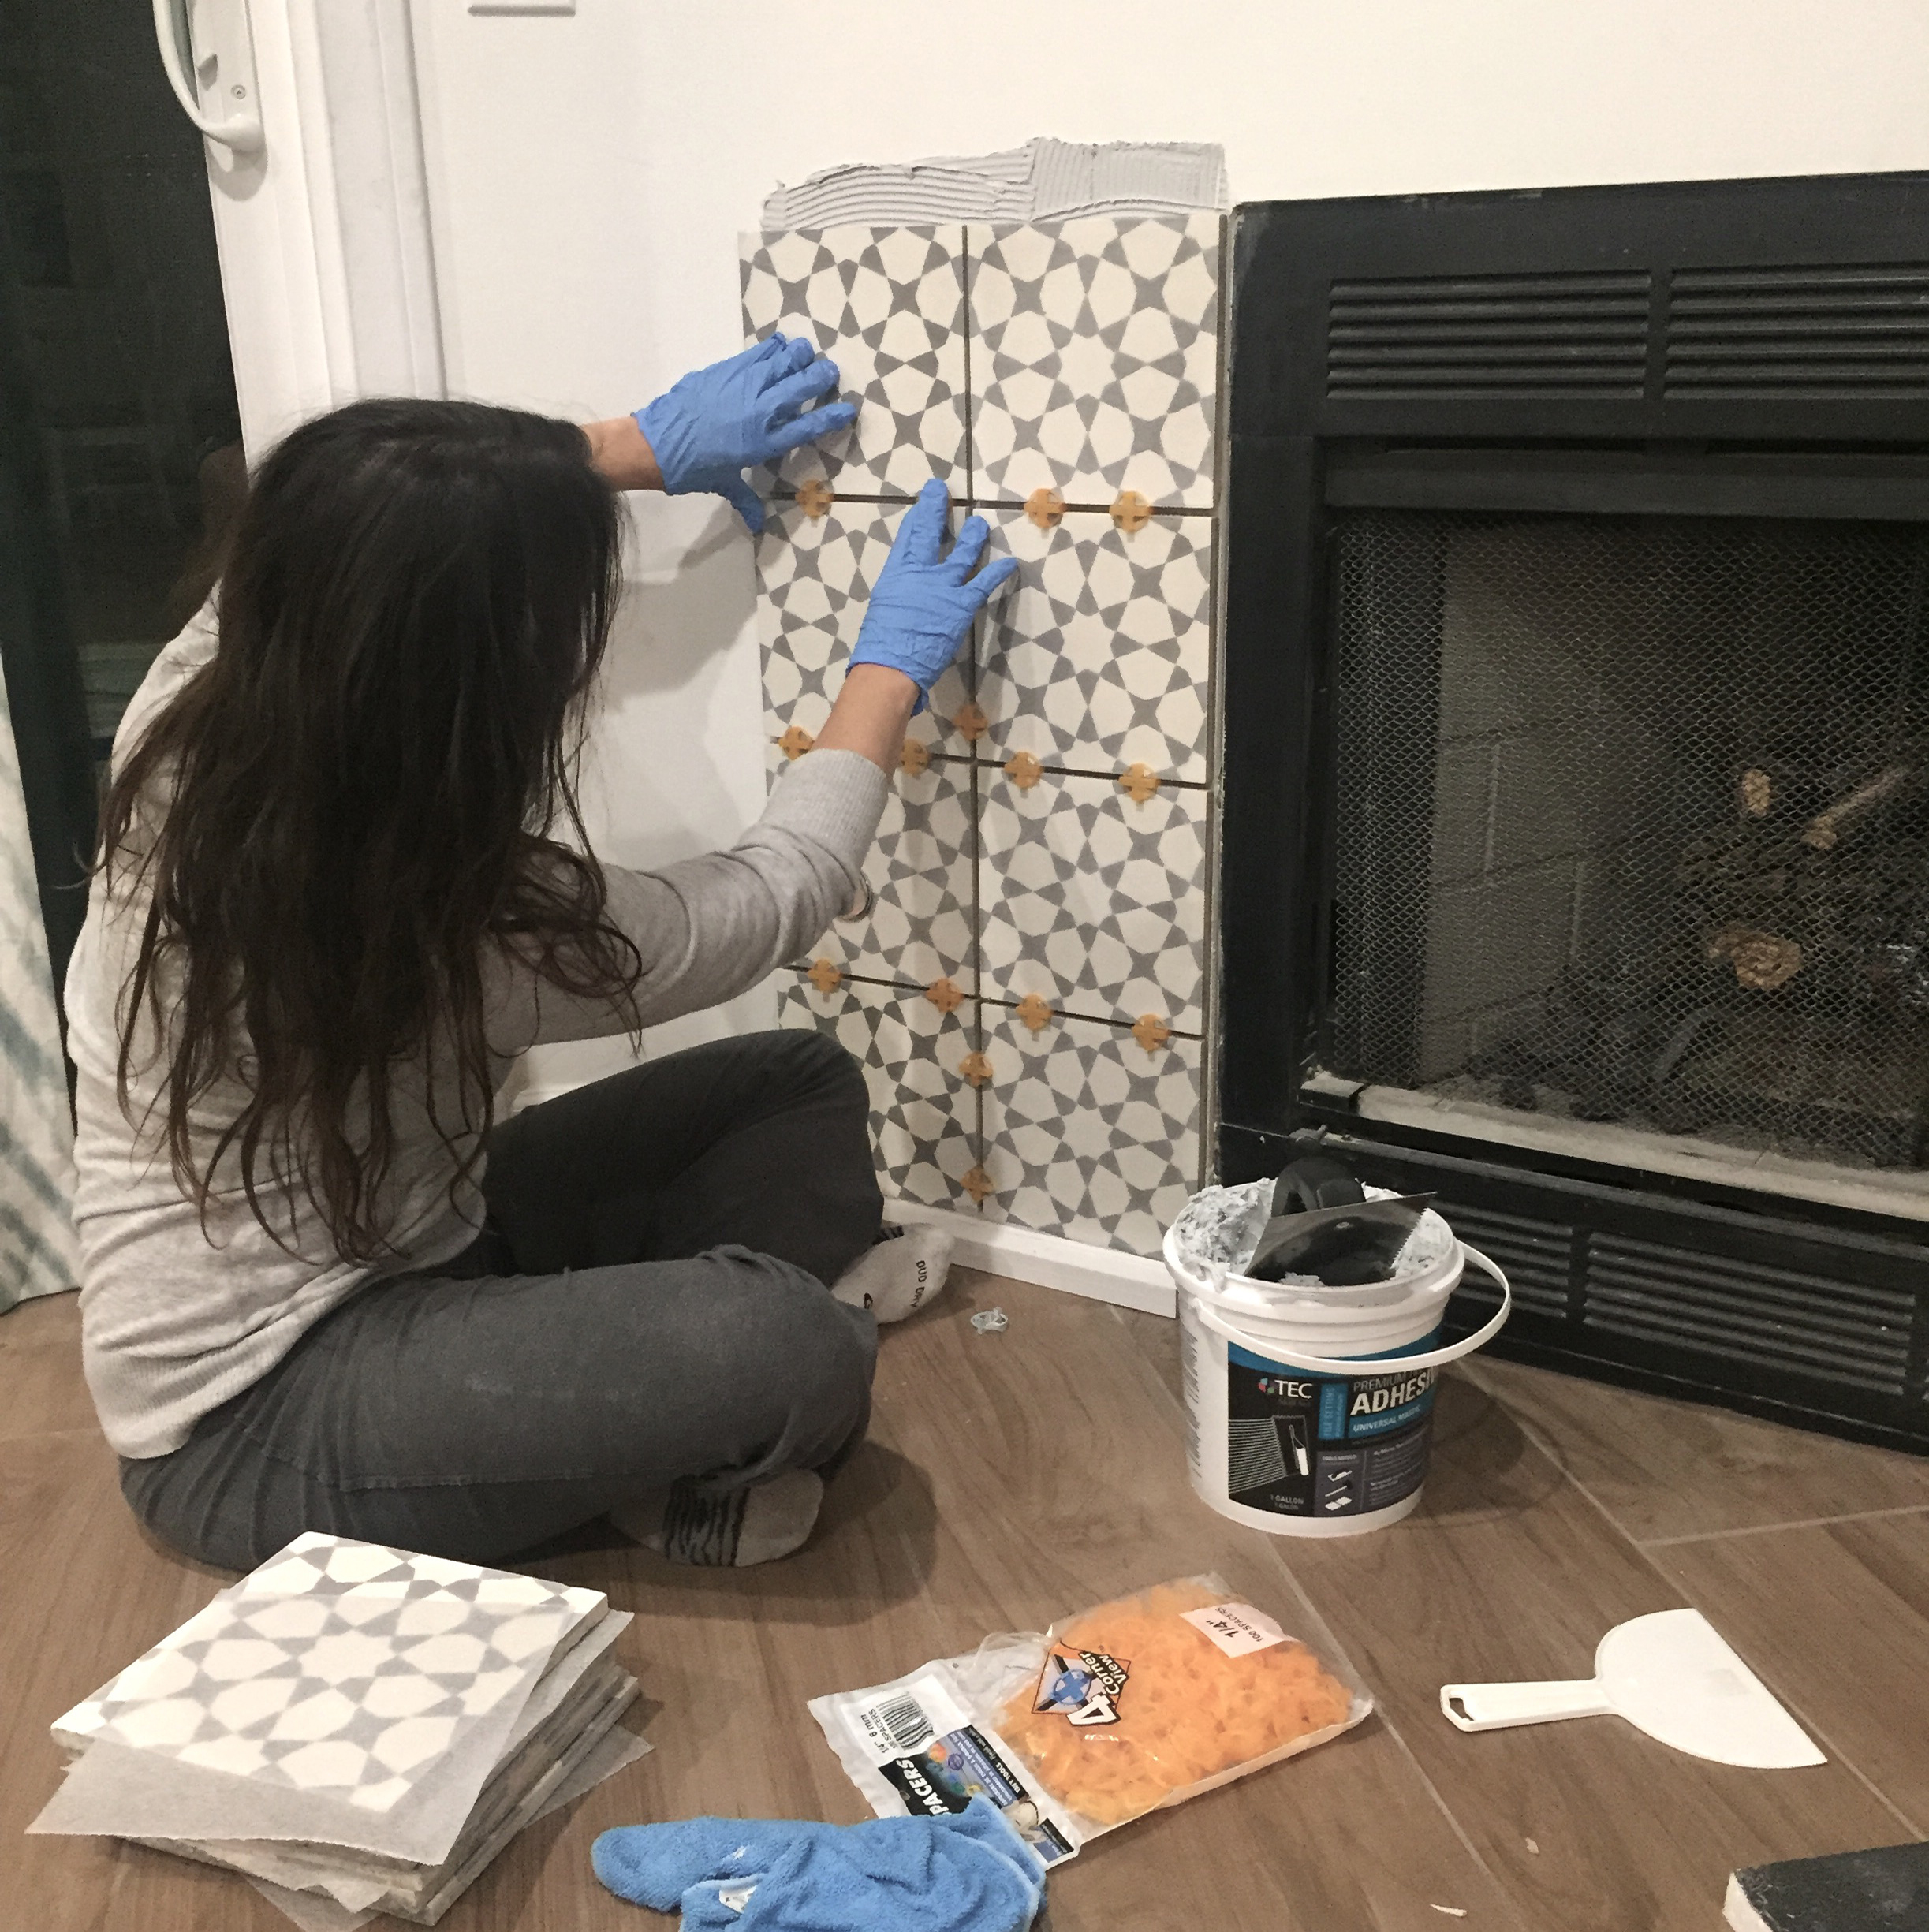
To support the horizontal tile I used a makeshift support created with scrap wood so they heavy tiles would stay in place while the adhesive dried.
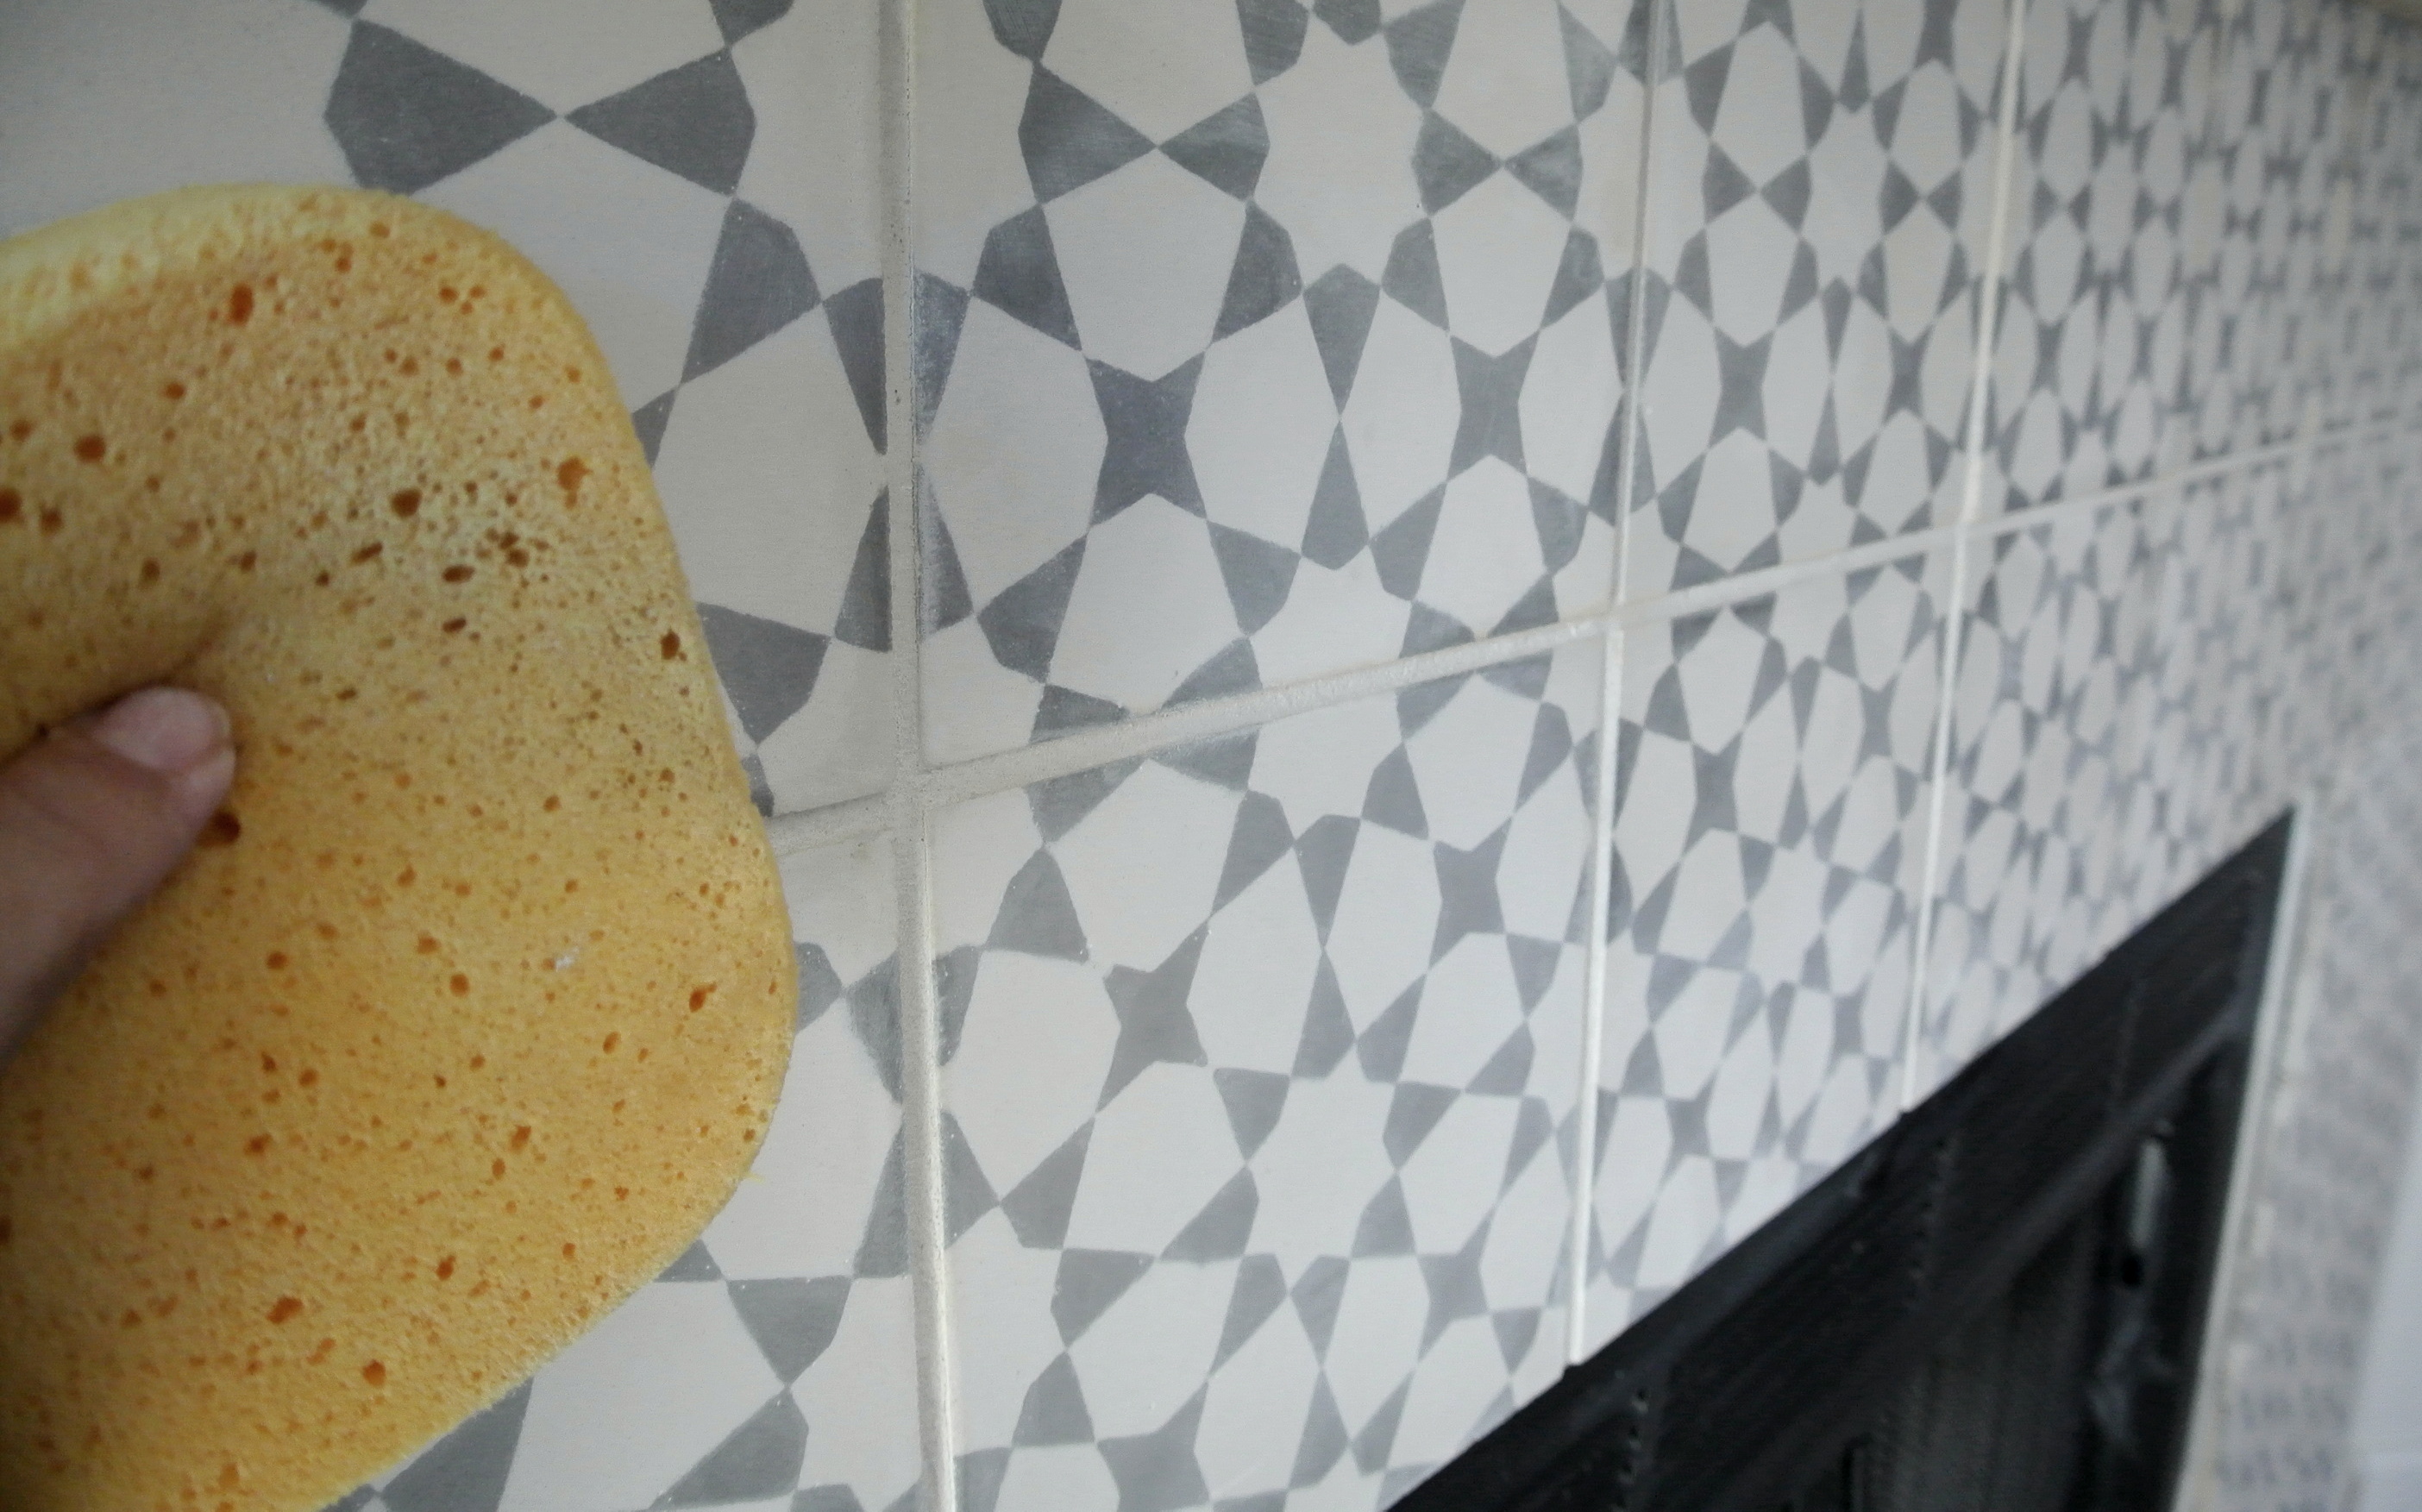
I color matched the grout to Antique White but added a bit of Bright White to the mix since the Antique White grout was a hint too yellow. I used a grout float to apply it and a sponge to clean the tile.
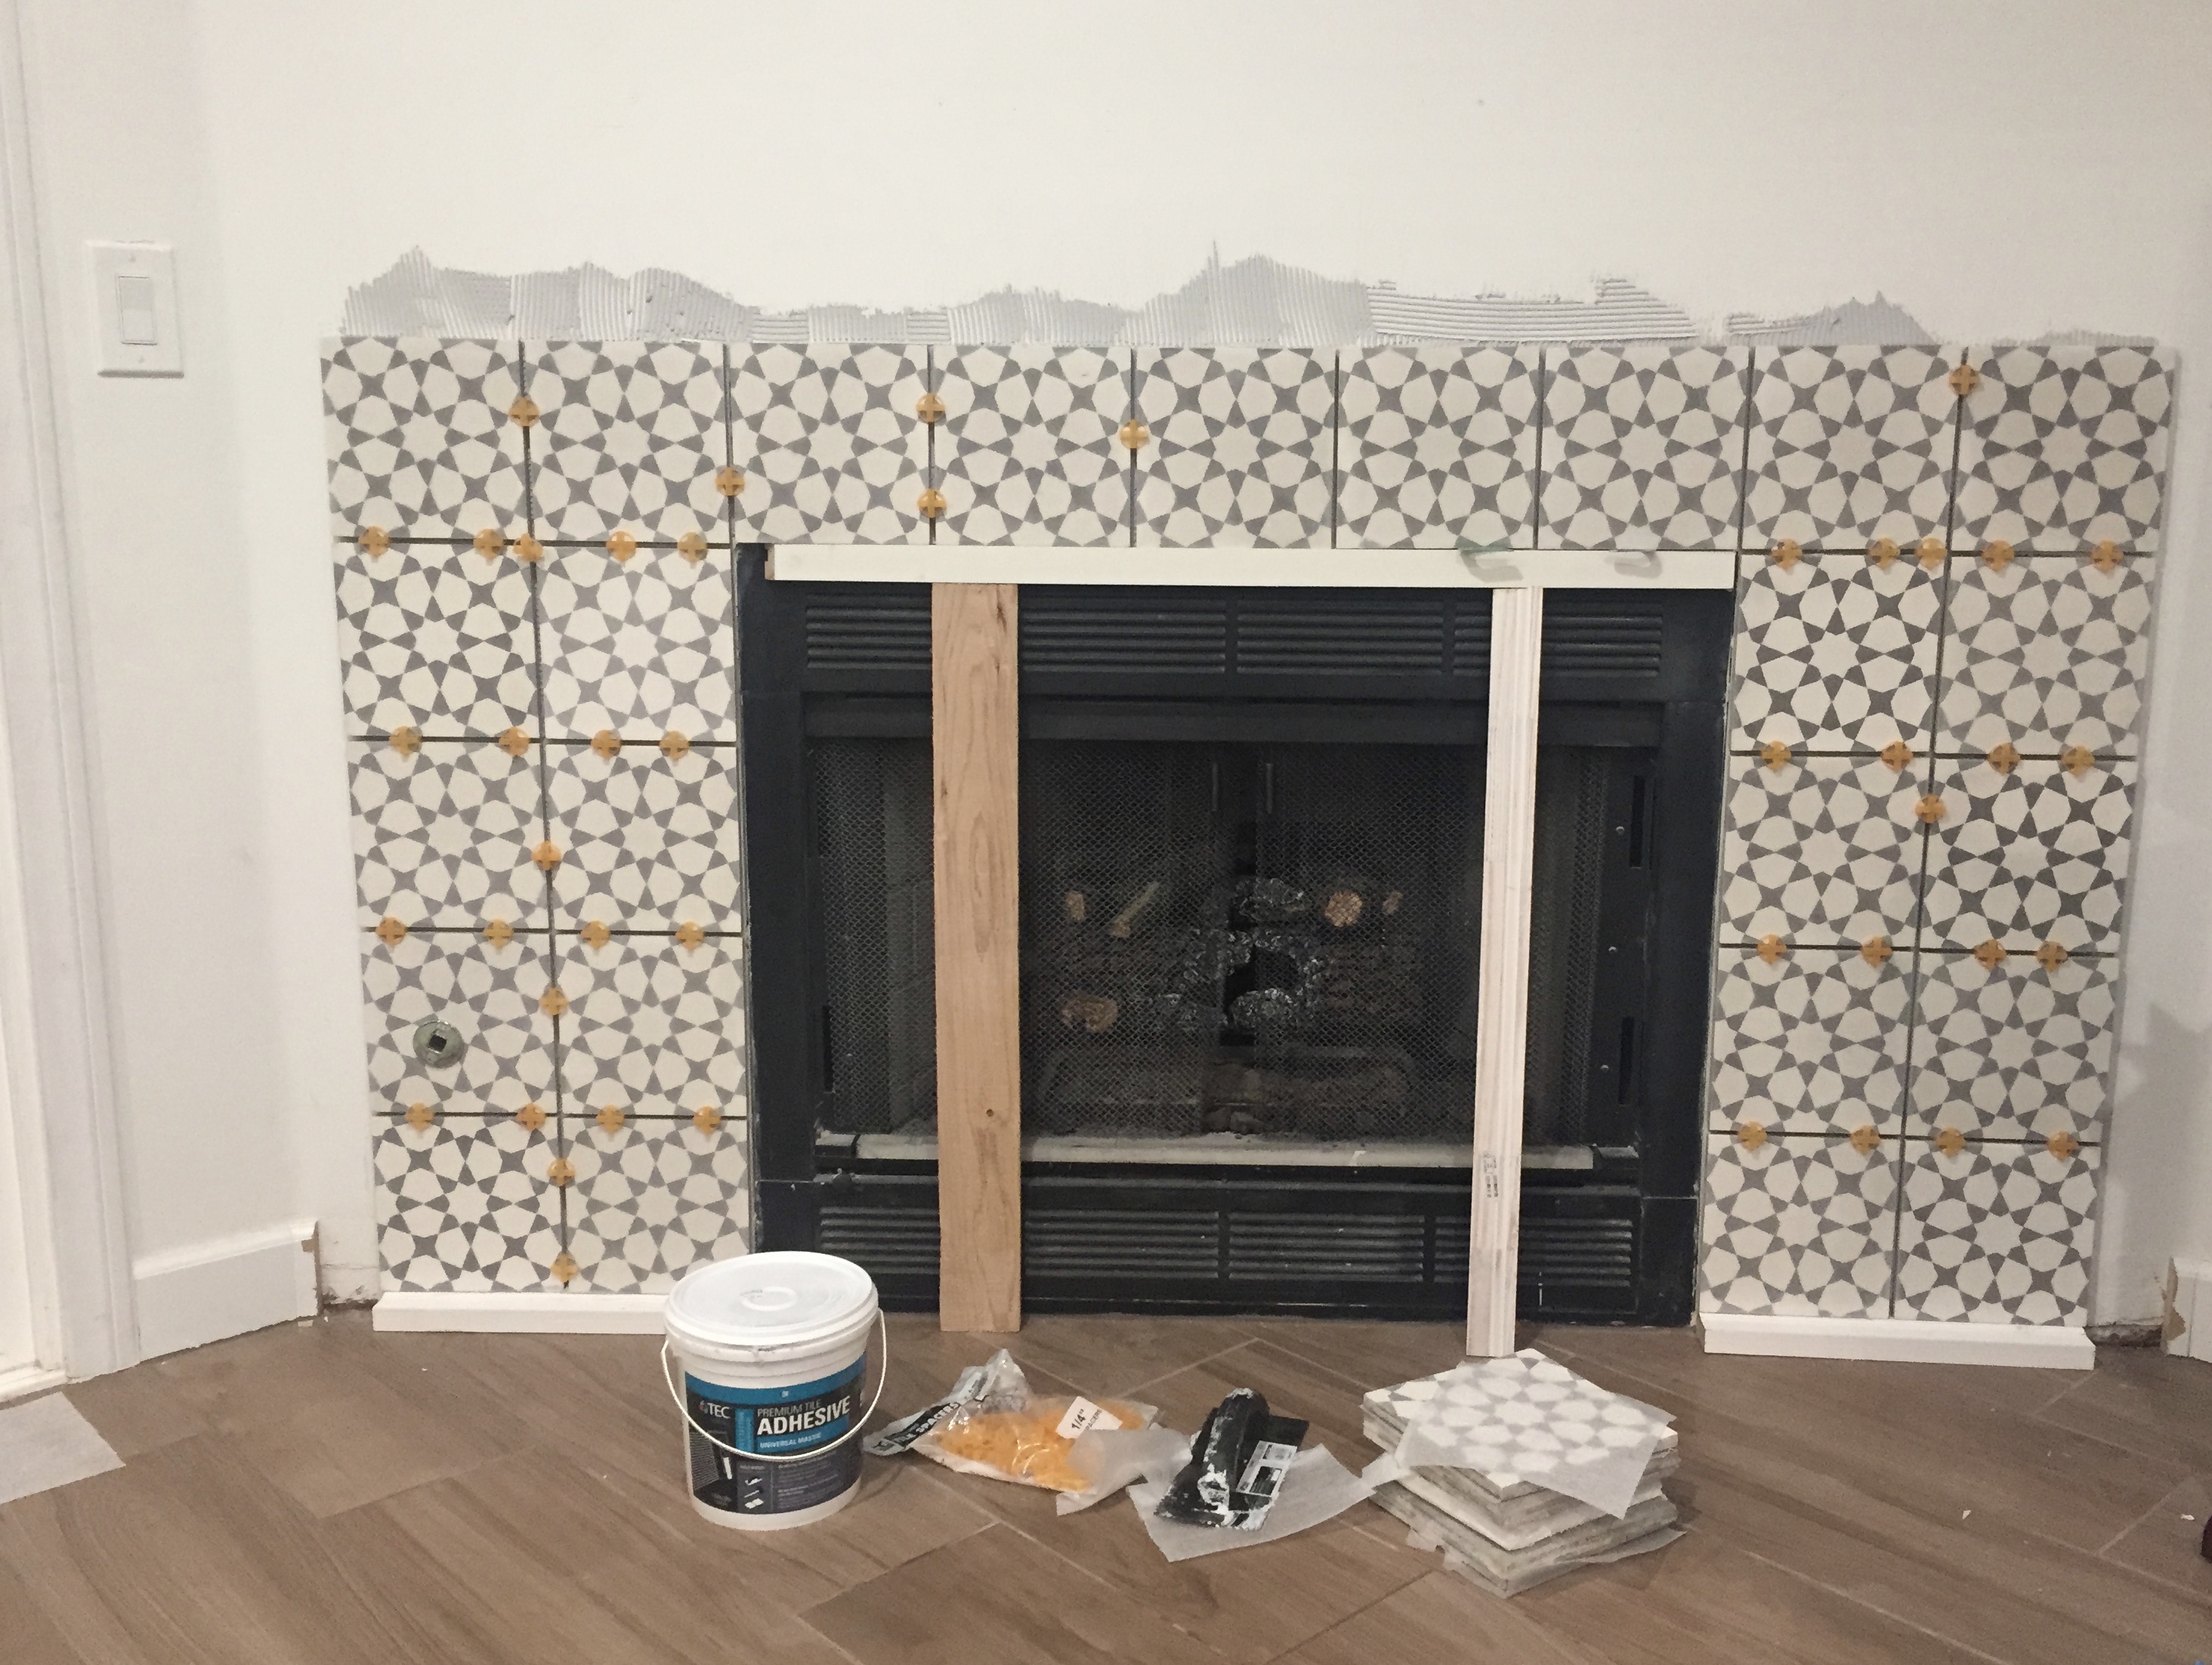
With ¼” spacers I was left with a sliver of tile on the bottom, so rather than cut an uber skinny piece of tile we finished off the bottom with basic 3/4” trim.
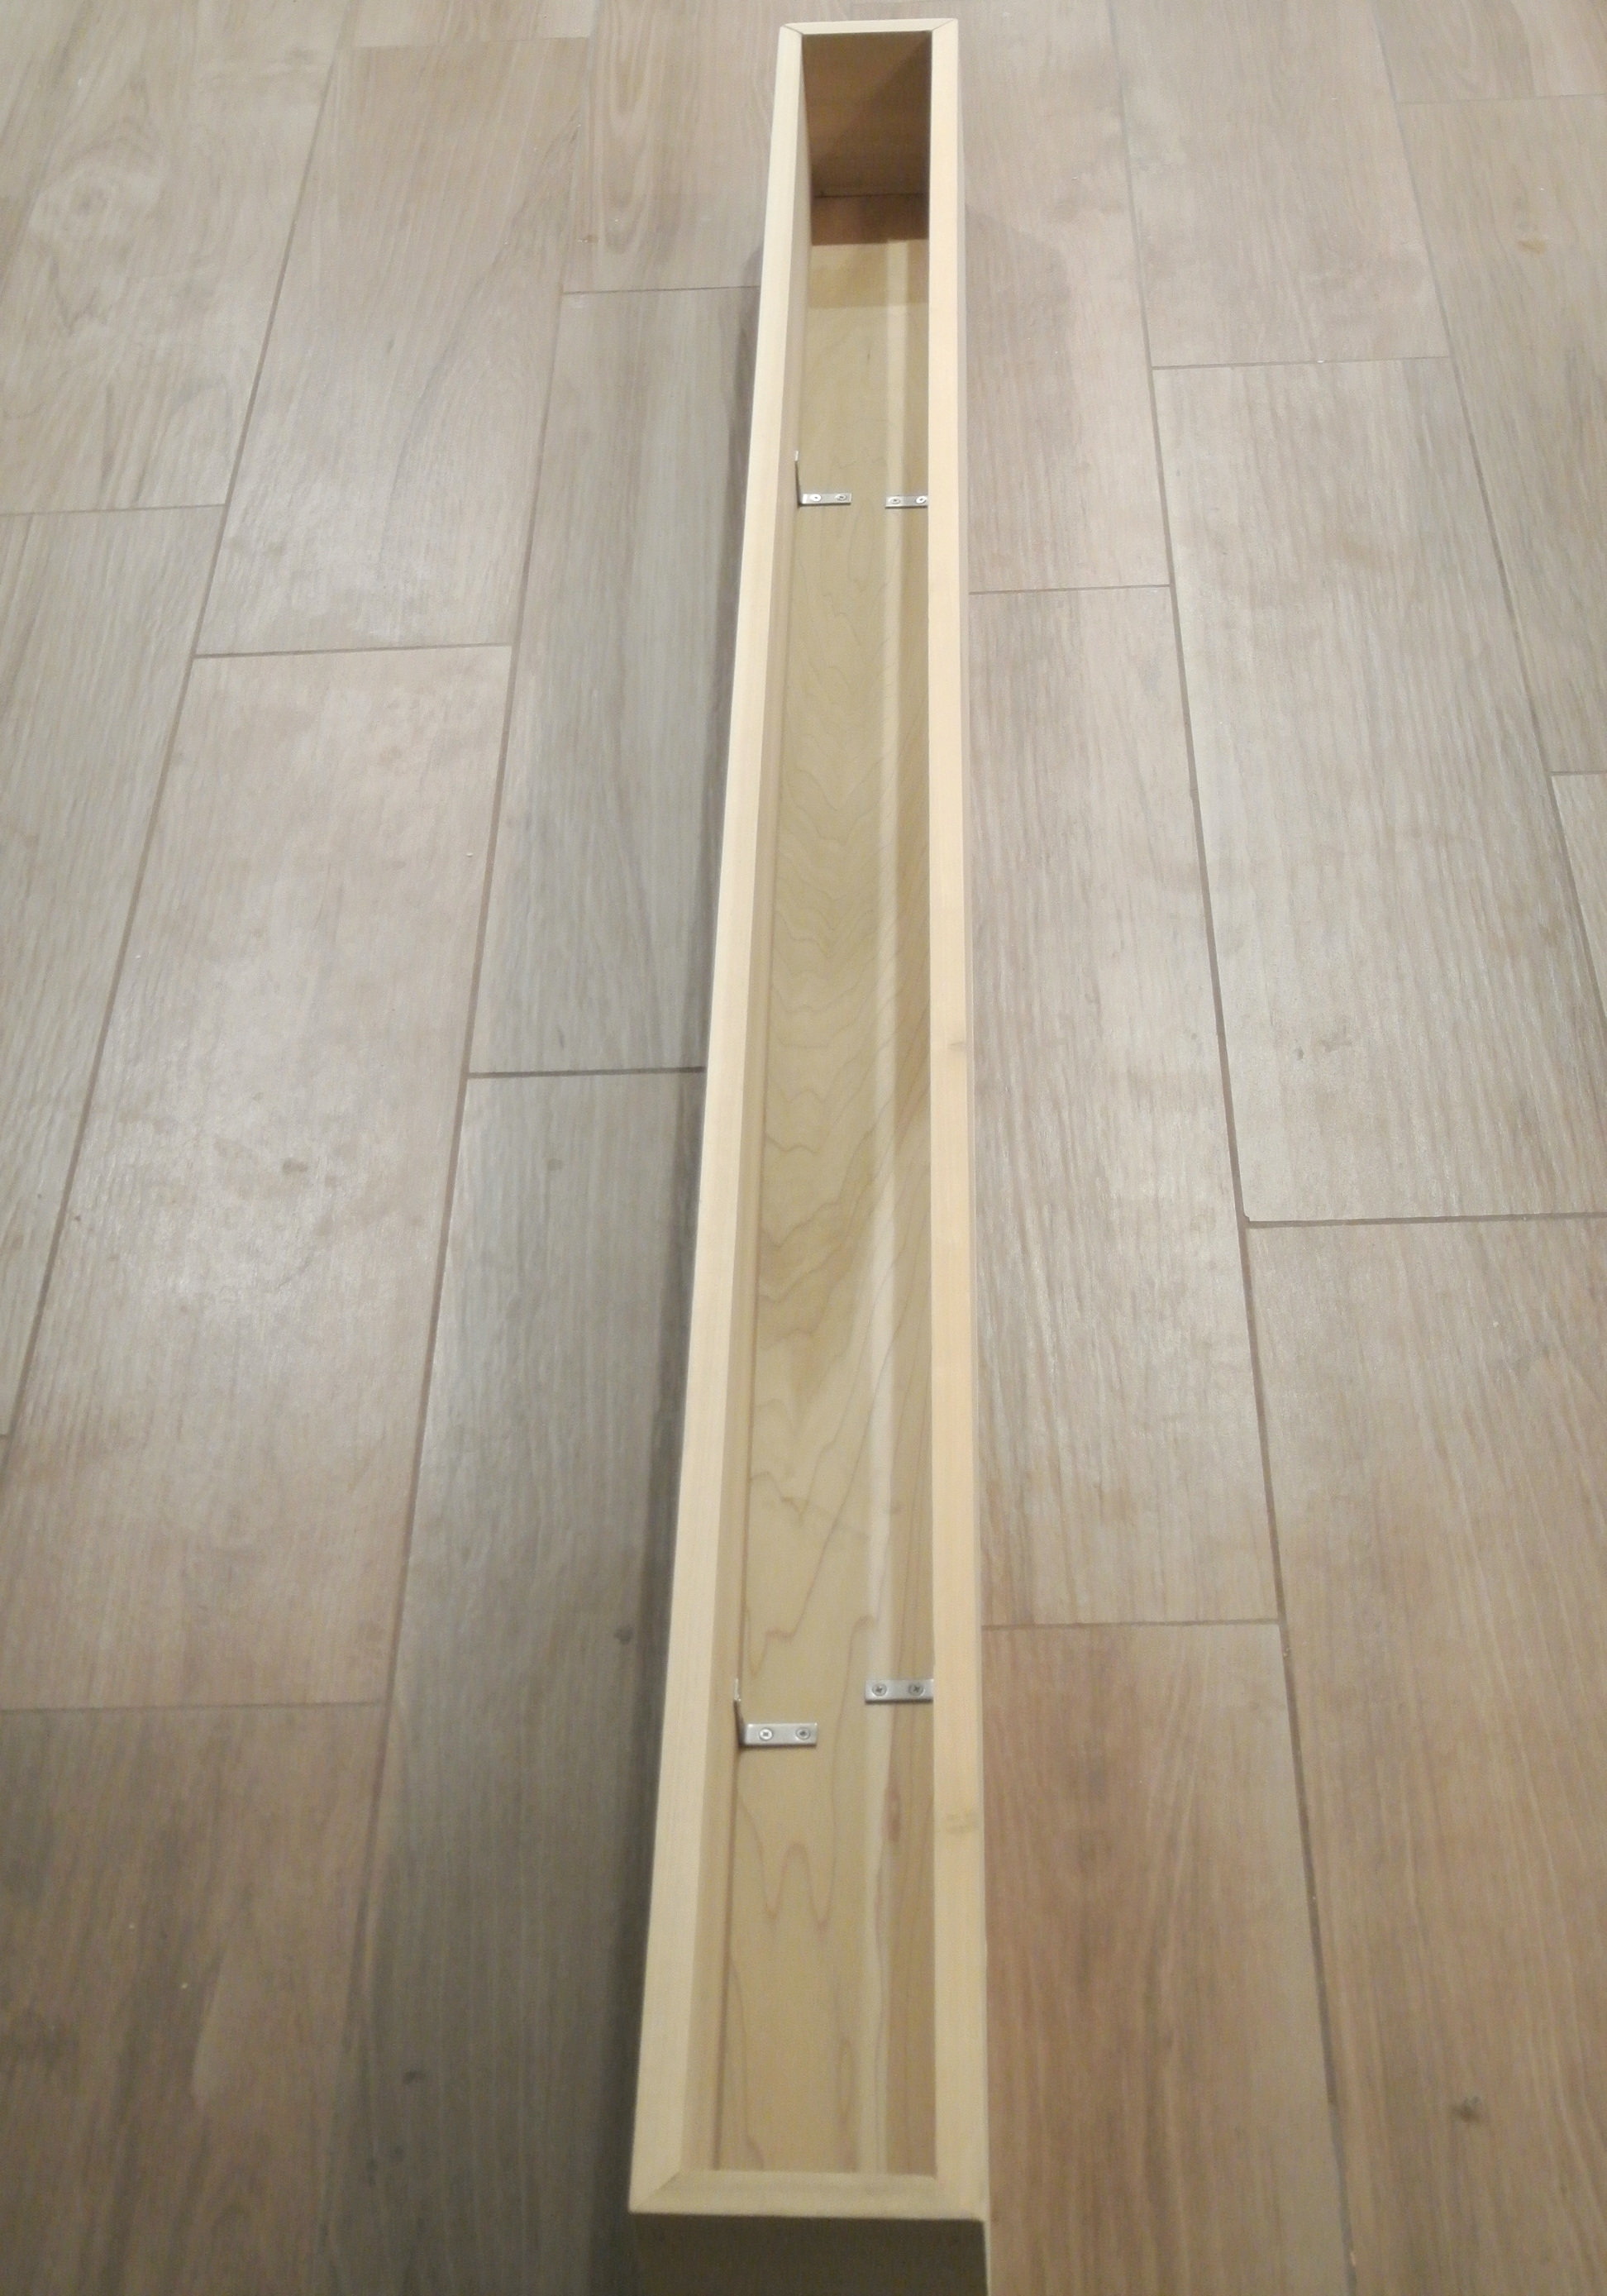
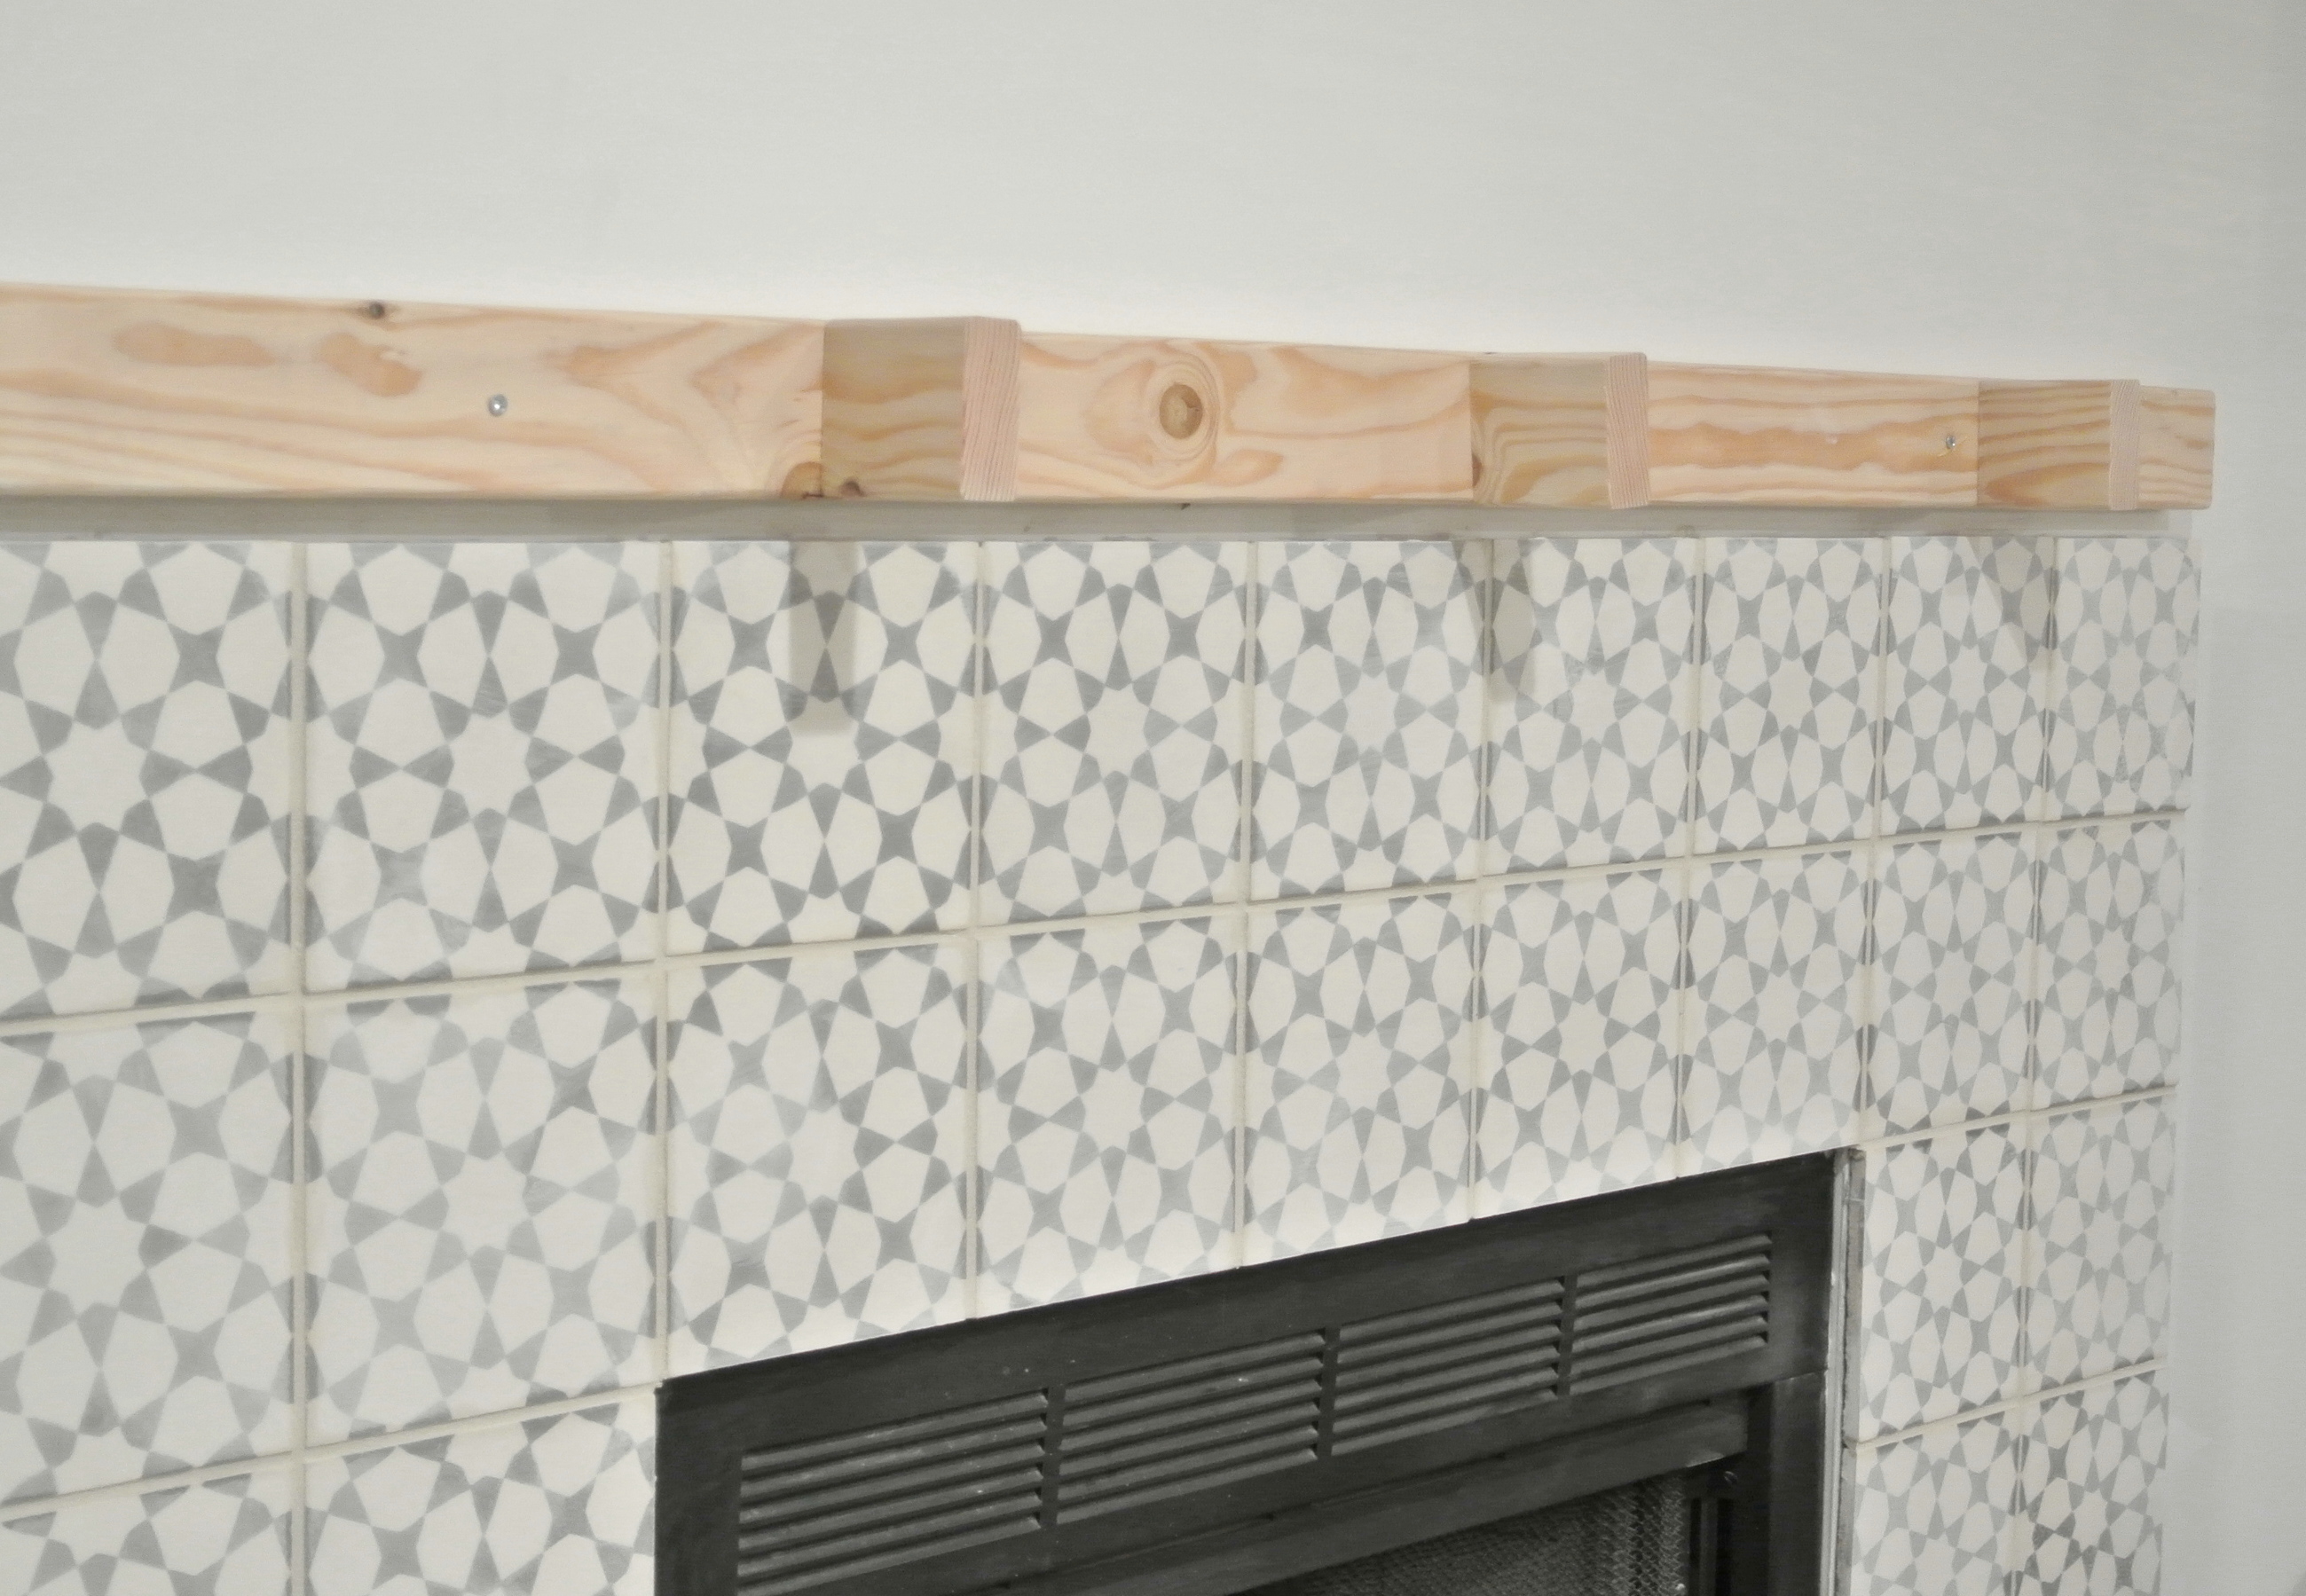
Matt also built a basic wood mantel out of birch wood, he didn’t follow any specific tutorial, just read a few floating mantel articles online and built the box to fit the width of the tile using an inner support made with 2 x 4s.
The three sided mantel box has a hollow interior, Matt used L brackets with wood screws to keep the frame together and nails to attach it to the inner frame. The inner frame made with basic 2 x 4s is screwed into the wall studs.
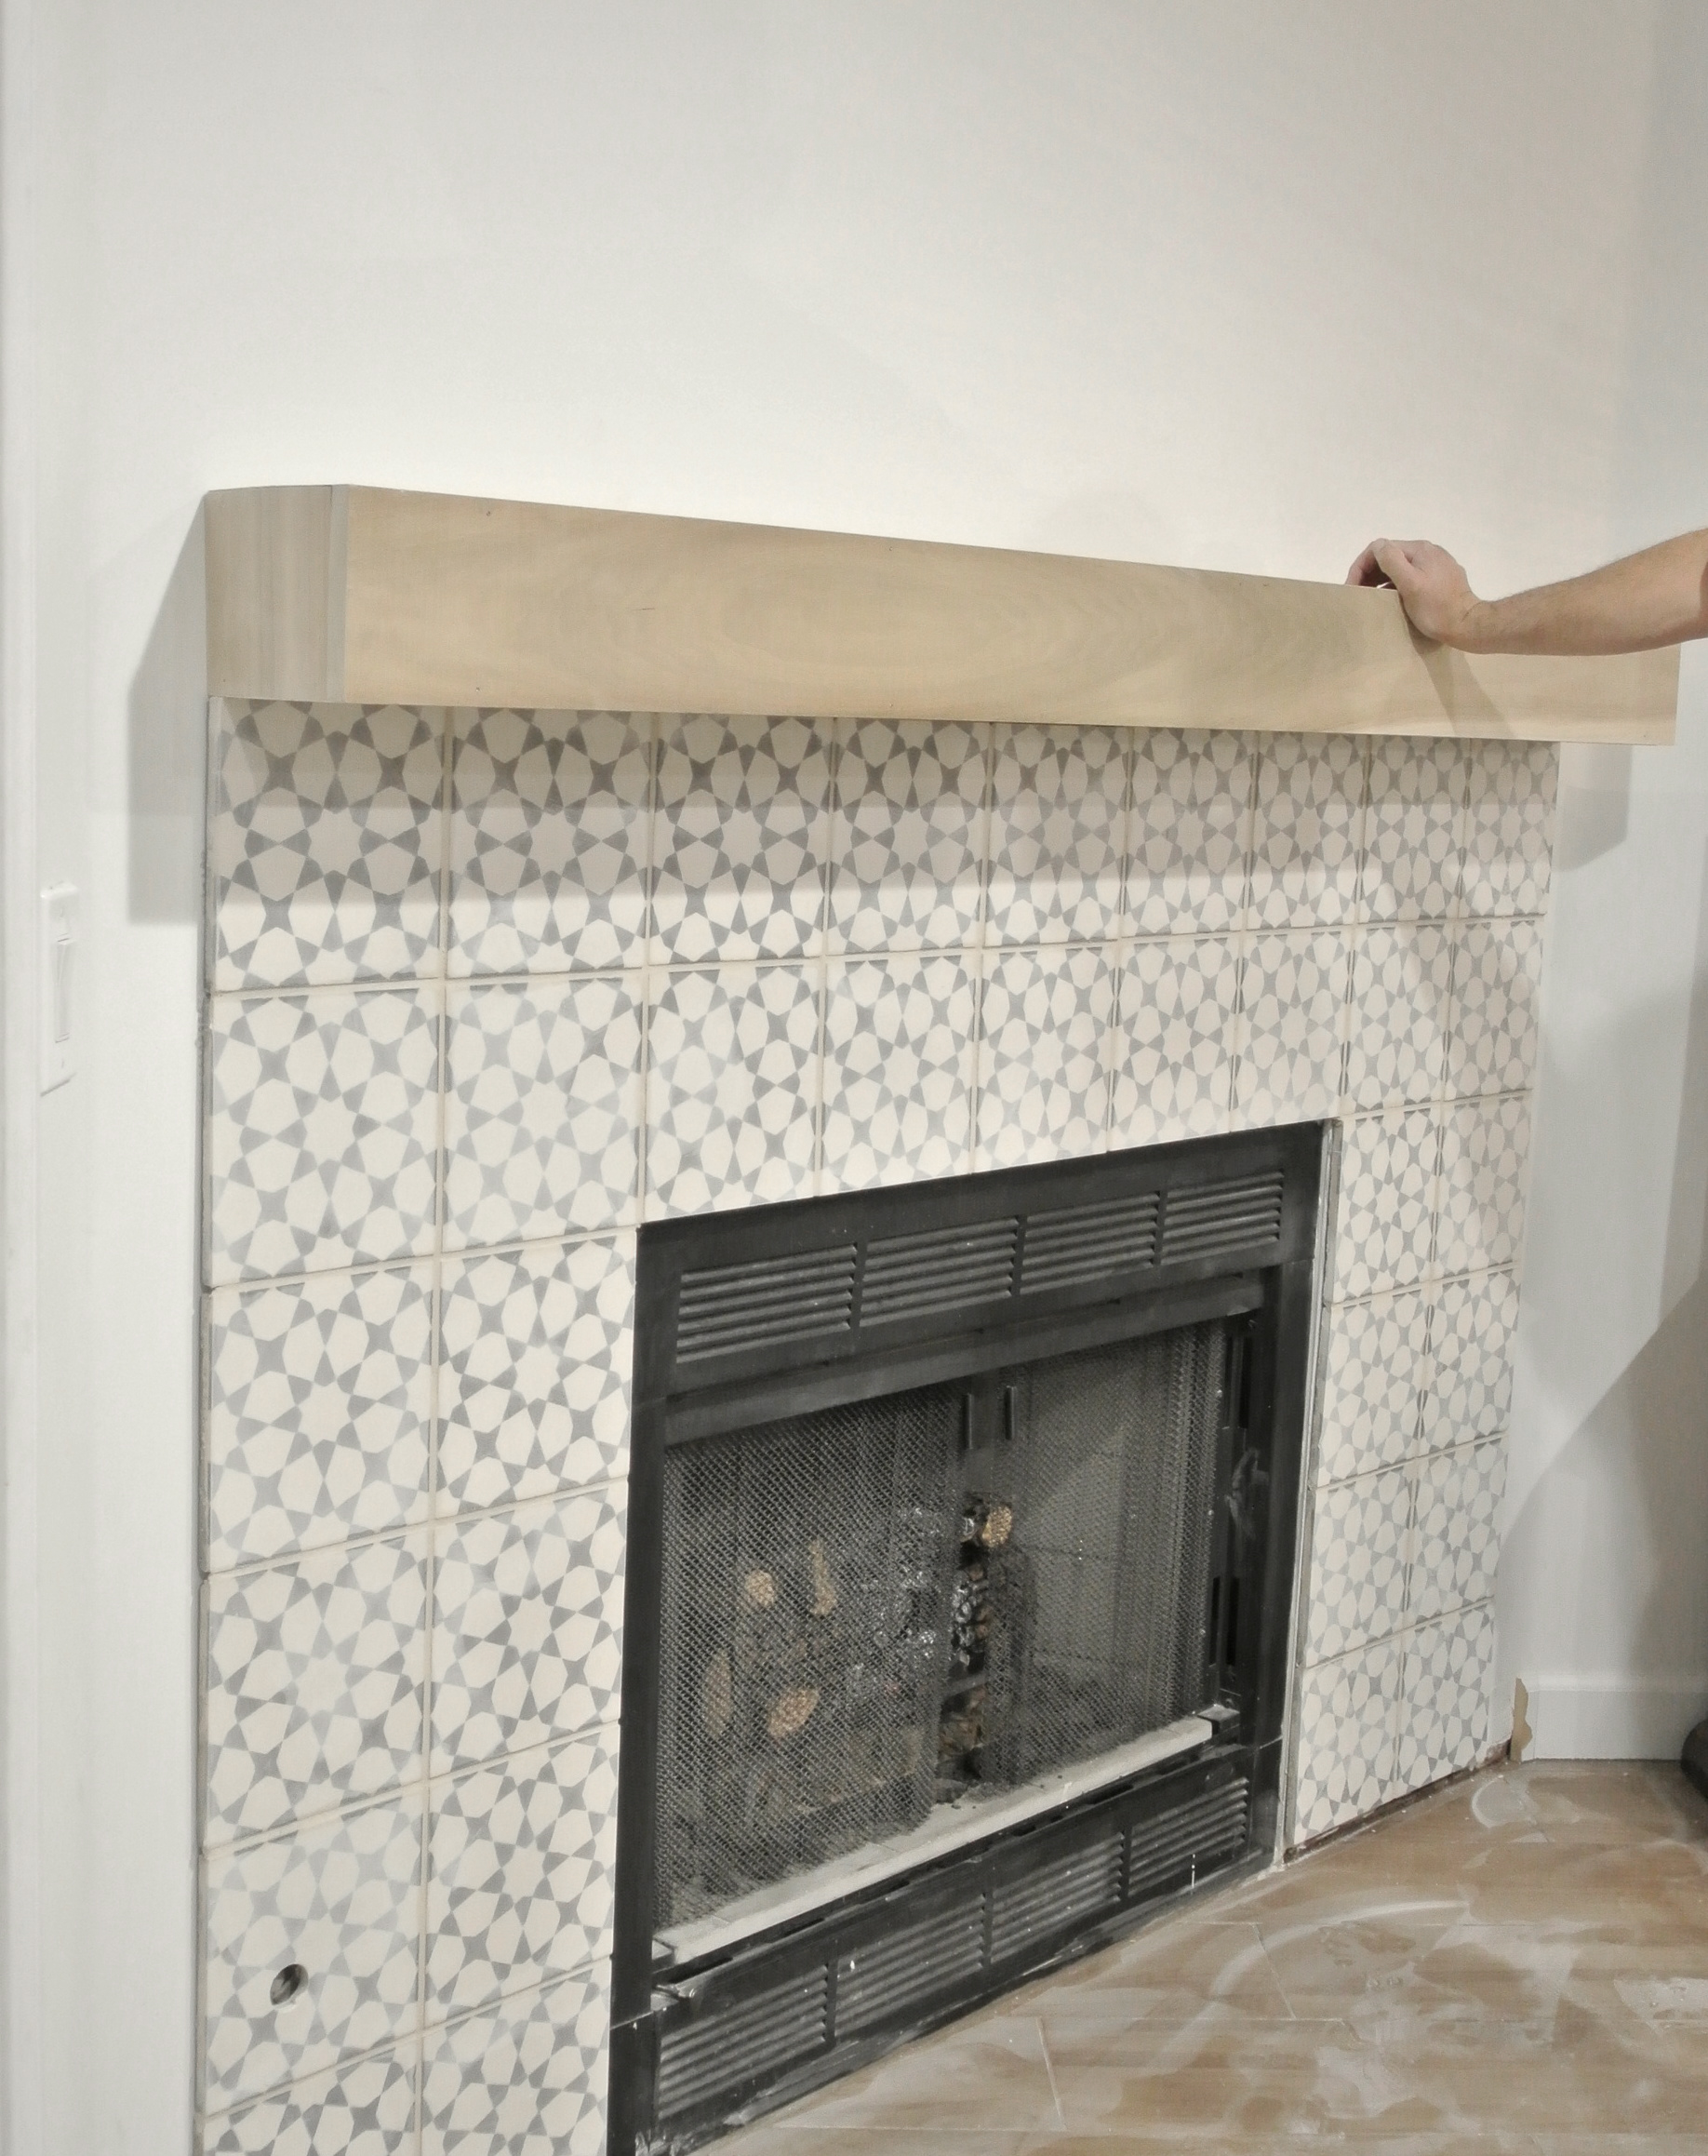
I tried different stains but decided just to use a dark walnut paste wax on the wood instead.
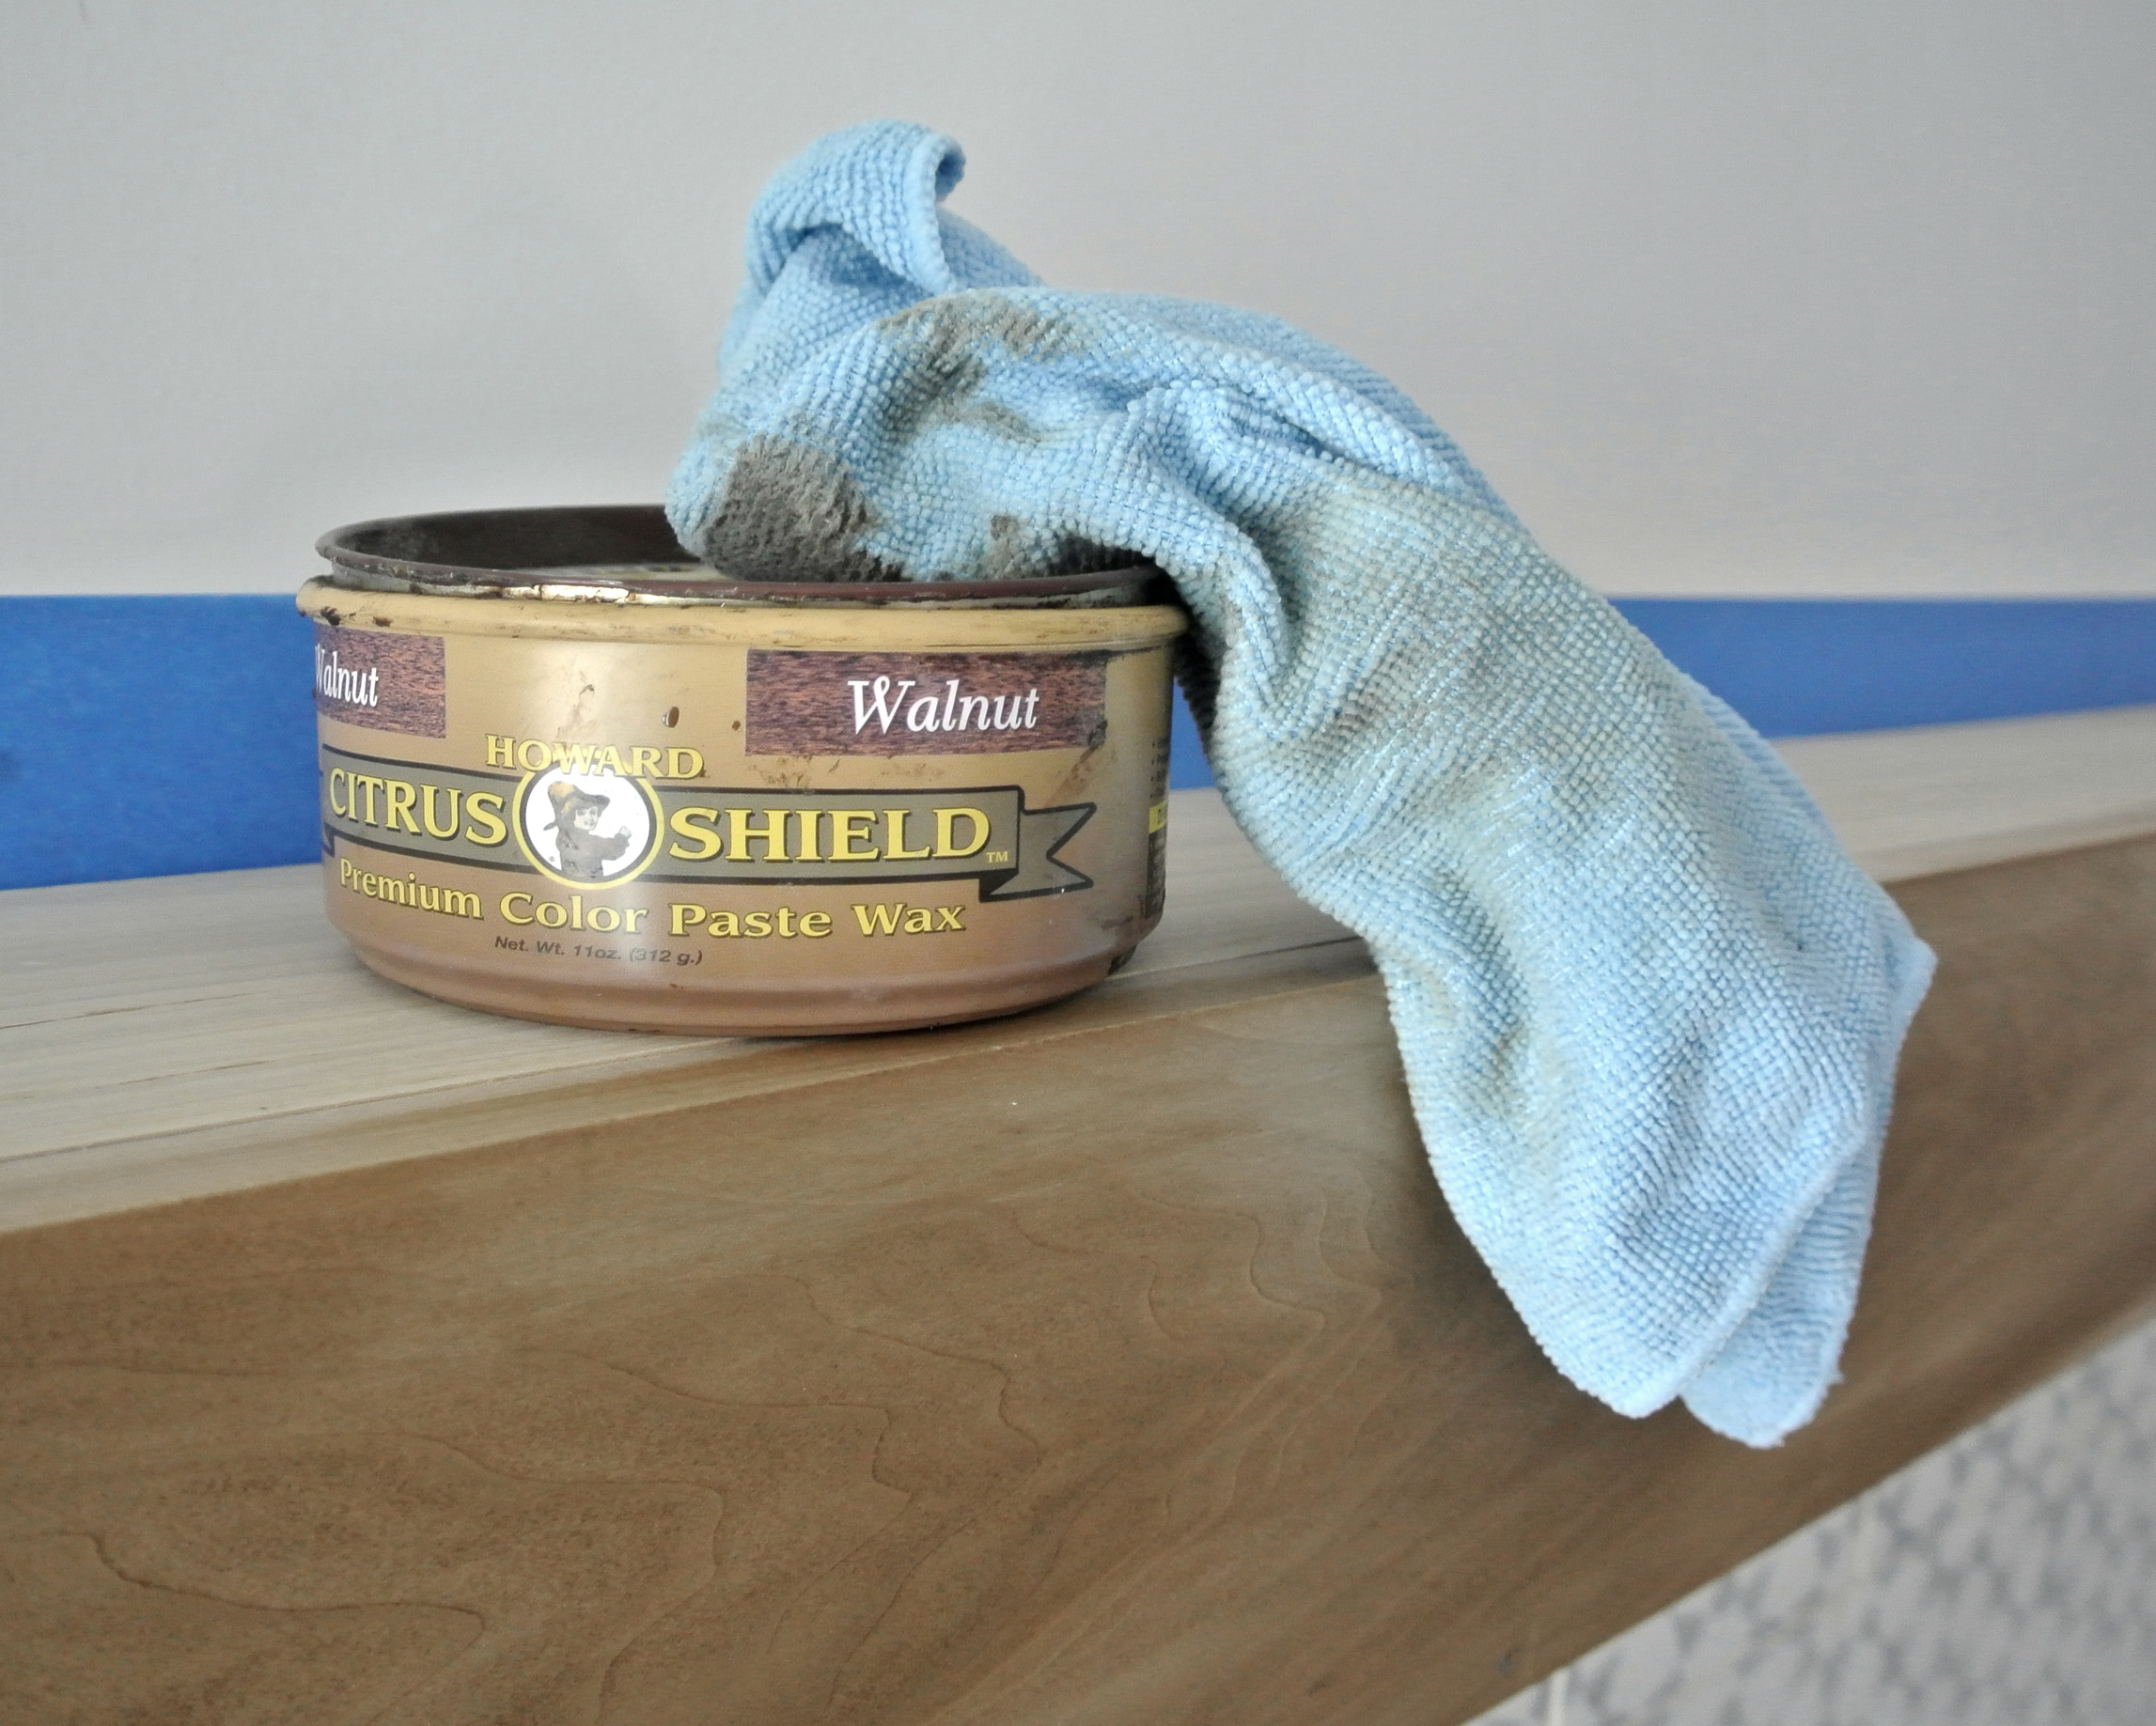
The resulting hue is a close match to the porcelain plank tile floors we installed last year.
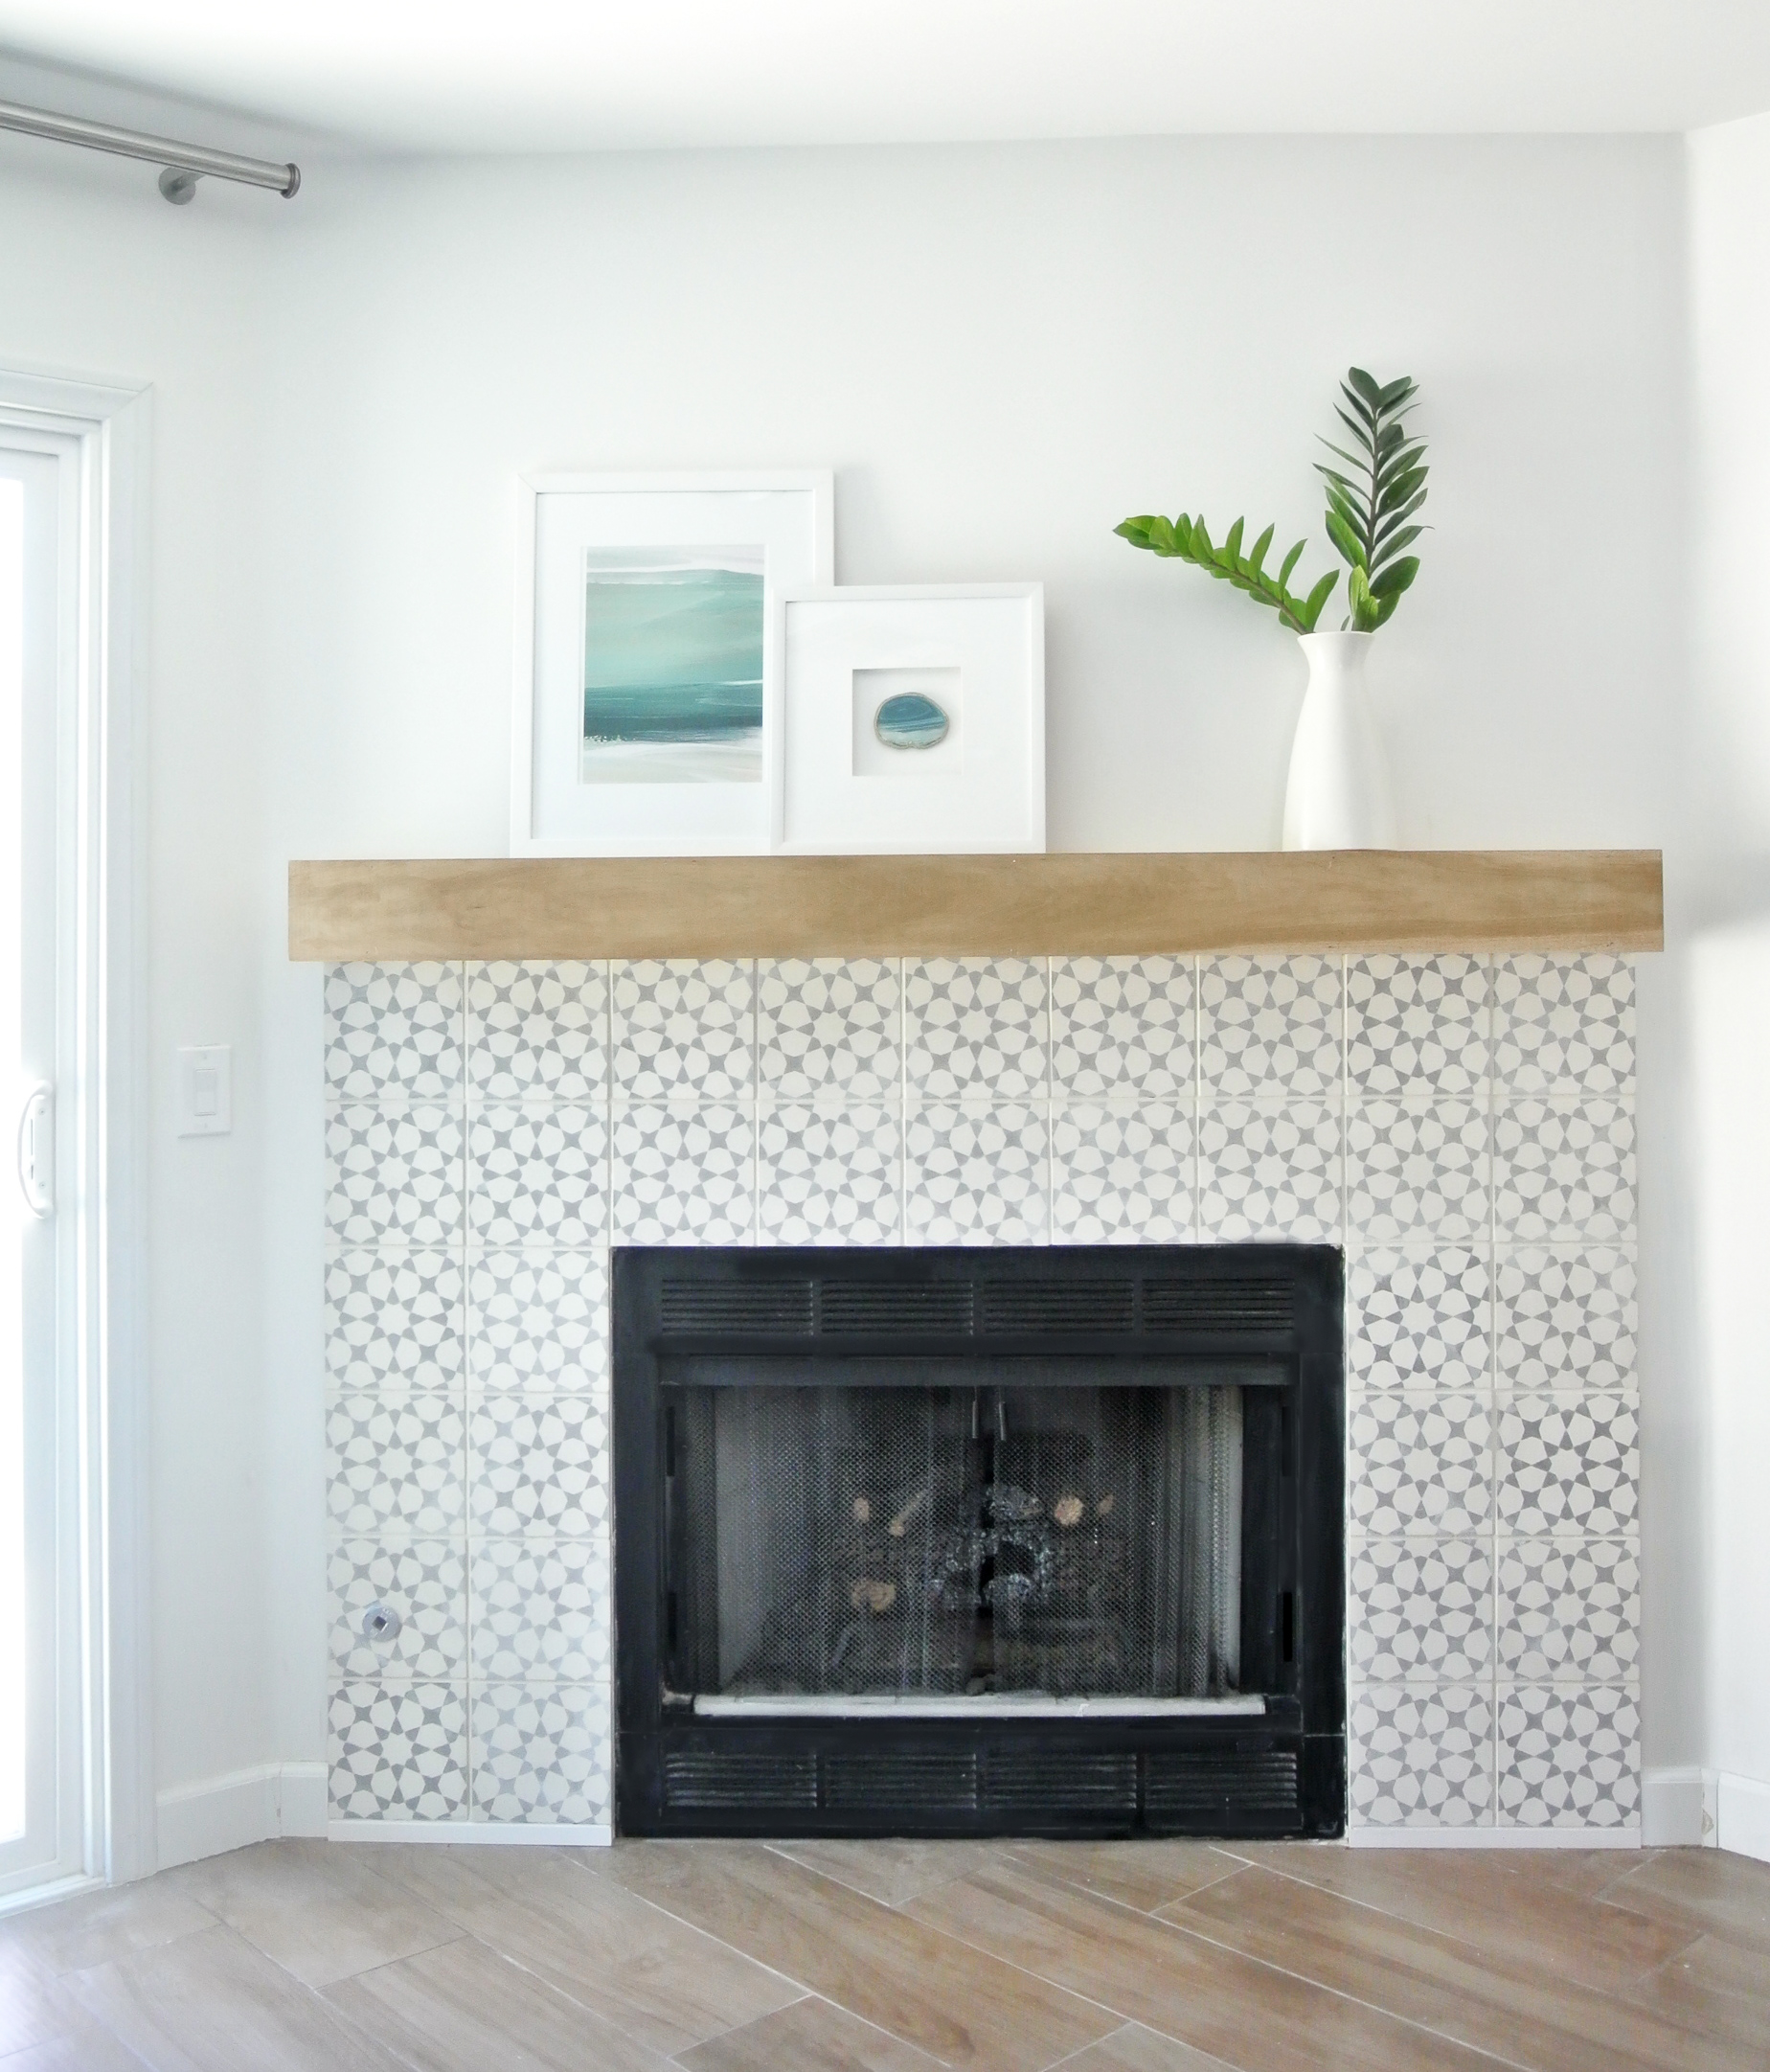
I love the new look! Here’s another side view of the before and after, this one with the past owner’s decor.
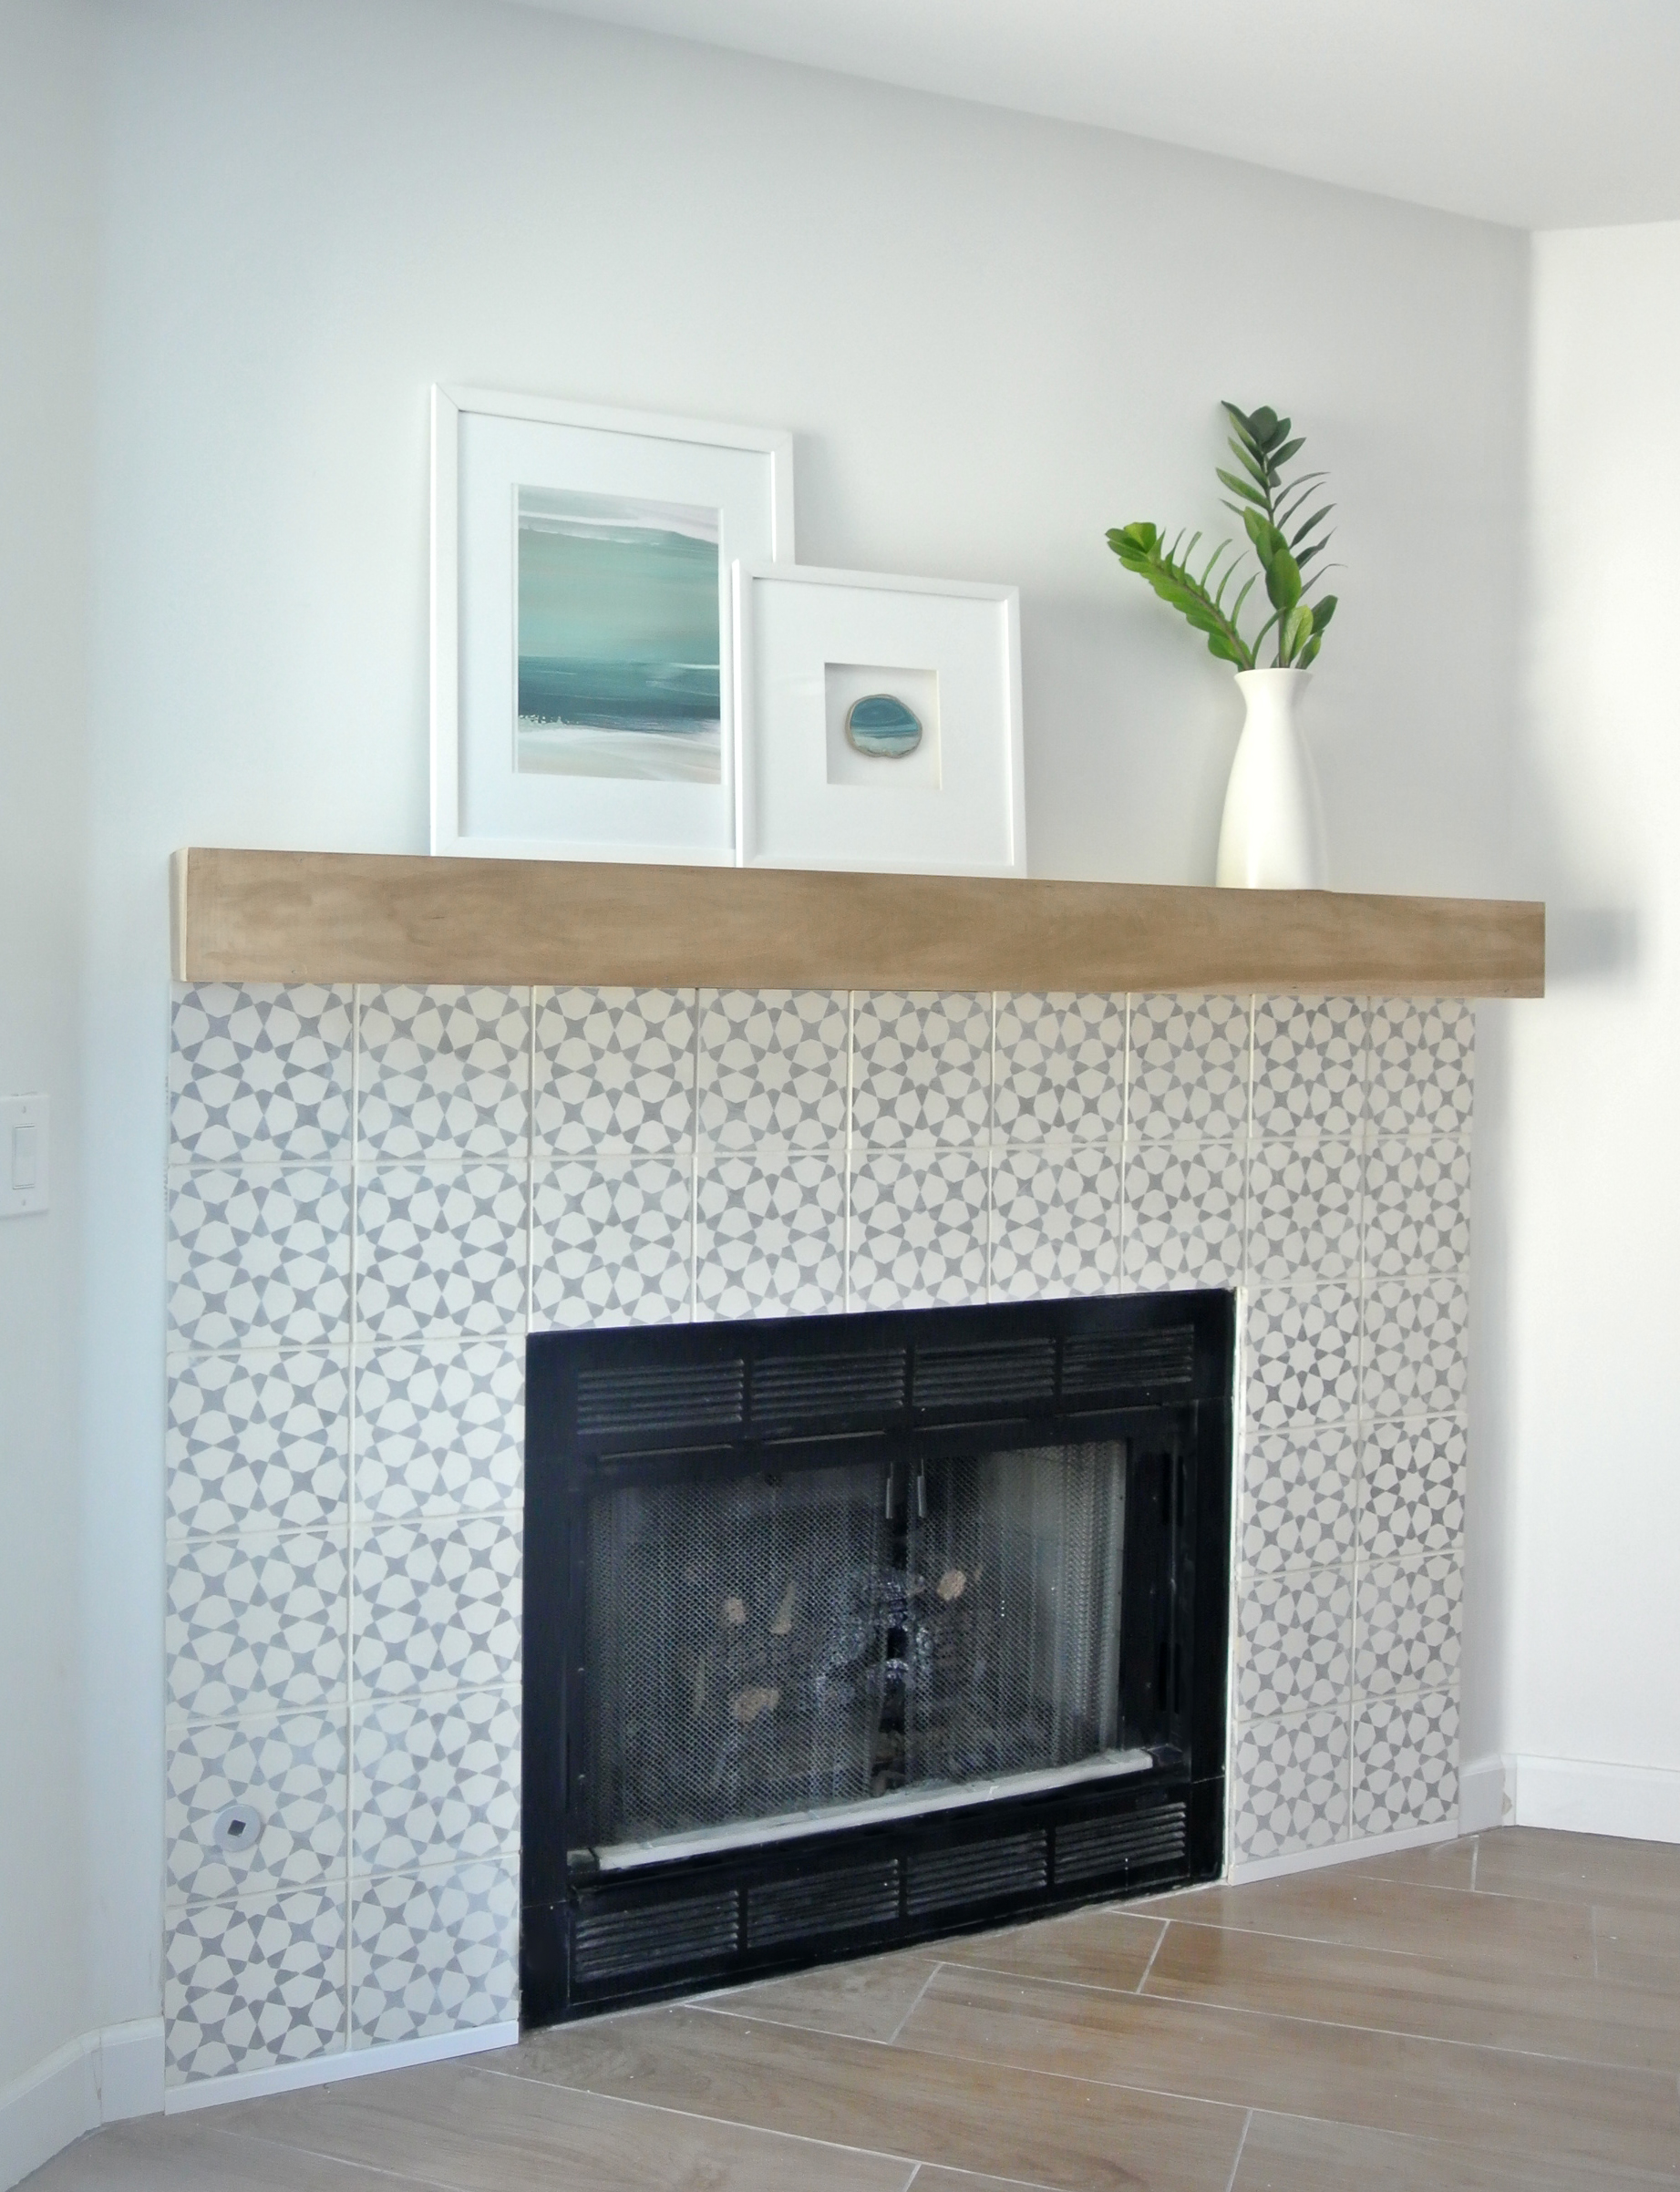
It’s a nice focal point looking from my fave teal blue sofa, the media stand is just to the right.
Happy New Year to you all! It feels good to be back! Let me know if you have any questions in the comments…
.
No comments:
Post a Comment