It’s about time for a studio update, right? I could list a dozen valid (and another dozen invalid) reasons why I haven’t done this sooner but I won’t waste your time. The truth is I’m embarrassed. A few weeks turned into a month. A month turned into a few months. A few months turned into six. Now it’s December. Life is crazy like that.
Anyhow, the studio!
I think the last time I shared pictures the walls and ceiling had just received a few coats of white paint. I went with Sherwin Williams pure white (SW 7005). Since then, the drywall dust has been cleared (Oh my word! Such a mess!! Cleanup took me forever.) and the concrete floor has been painted.
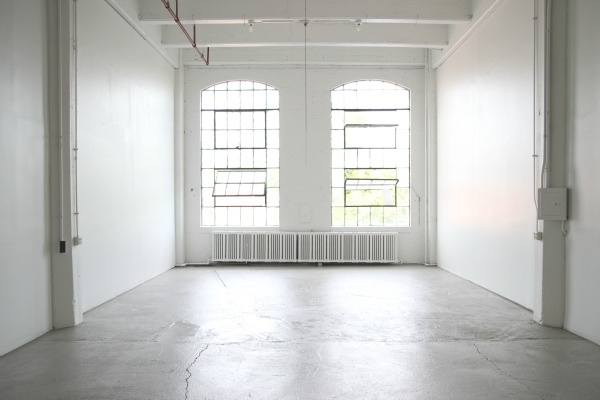
The original concrete was in rough shape. There were cracks, stains and some spalling. I could literally sweep chunks away with a broom. The space is accessed via a loading dock so all kinds of dirt and grease are tracked in on a daily basis. I decided painting the floor a dirty gray was the way to go.
To select the perfect gray I spread out a bunch of color swatches on the floor then walked all over them and picked the one that hid my footprints best. Oh, if only picking a paint color was always so easy! The swatch that made the cut was Sherwin Williams dorian gray (SW 7017) and it’s actually a really great color, a warm muddy gray. I had it color-matched in Valspar’s latex porch and floor paint then rolled on three coats. (That makes it sound so quick and easy but, I assure you, painting a floor with kids underfoot is anything but quick or easy. I do not recommend it.)
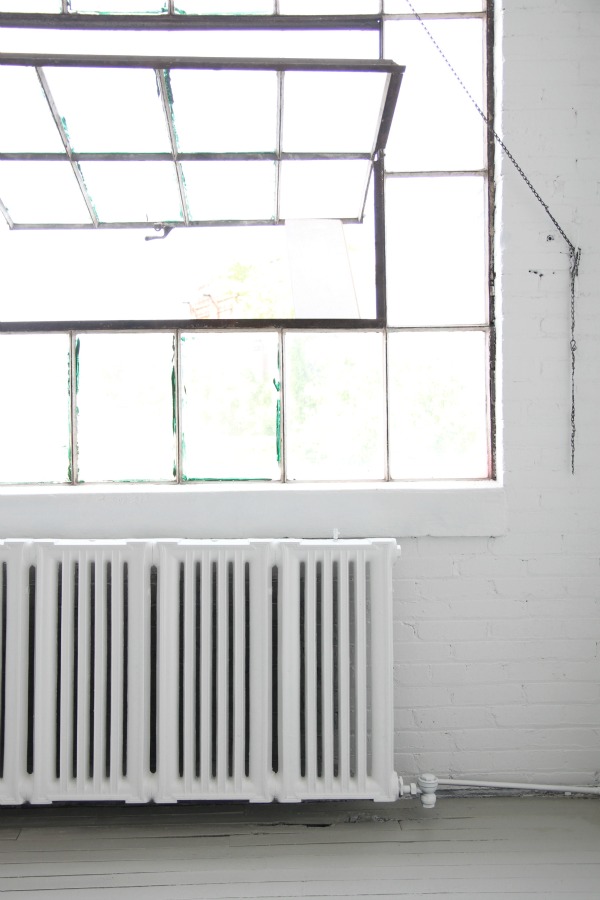
Way back when, there was discussion about what to do with the grimy radiator. After giving it a good scrub, I ended up spray painting it white. I did not attempt to do this with kids around (which made finding time to do it even more difficult) and I tackled it before painting the floor. It took an insane amount of paint (eleven spray cans I think?) and I’m pretty sure I lost whatever brain cells I had left after baby #3 was born. Which explains why maybe this post isn’t the most bestest.
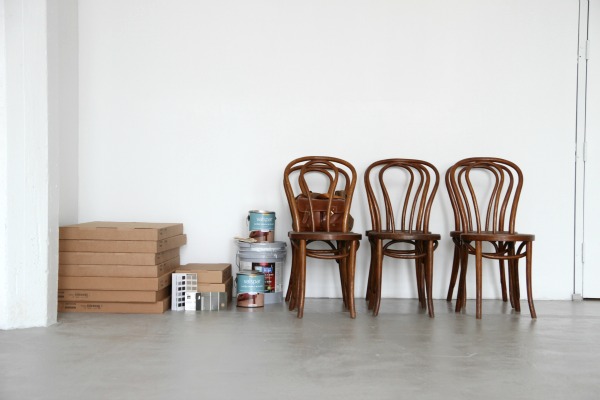
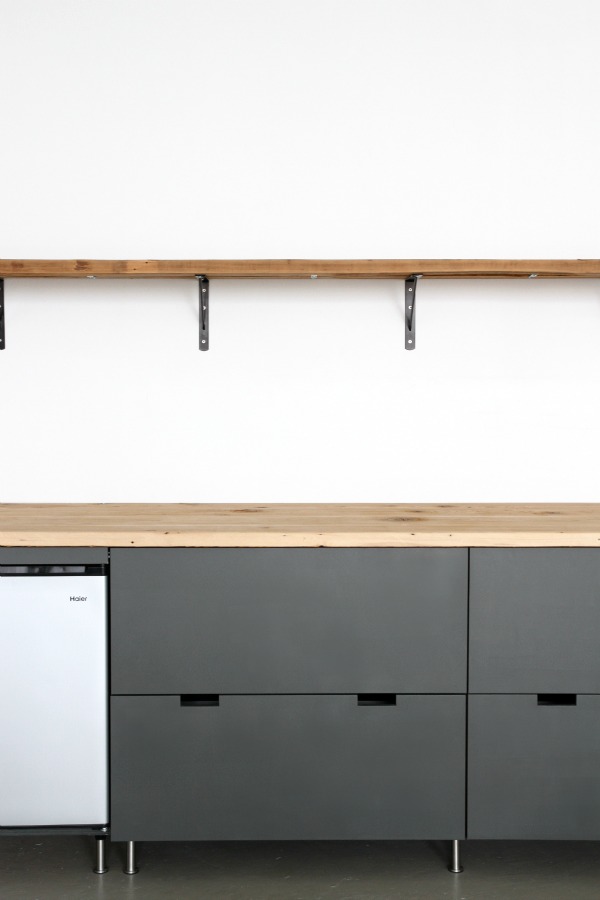
After everything was cleaned and painted, I got to work on the dry bar. (I also scored six Bentwood knockoffs at our local Habitat ReStore for $12 total!) I used cabinets from the SEKTION line at IKEA. I bought a pair of 36″ base cabinets with two drawers each and one 15″ base cabinet with three drawers. I chose the Ma drawer style and, since I planned on painting the fronts a dark color, I chose the wood effect brown frames which I so wish had been available when we were renovating our kitchen. (Our fronts are dark and slivers of the white frames peek out in a few places.)

I built the cabinets and Steve helped me install them. Everything you’ve heard about assembling IKEA cabinets is true: Staring at all the boxes and pages of instructions is daunting but, after you’ve put one together, you can put together a hundred. We opted for steel legs instead of a toe kick since it is a warehouse after all.
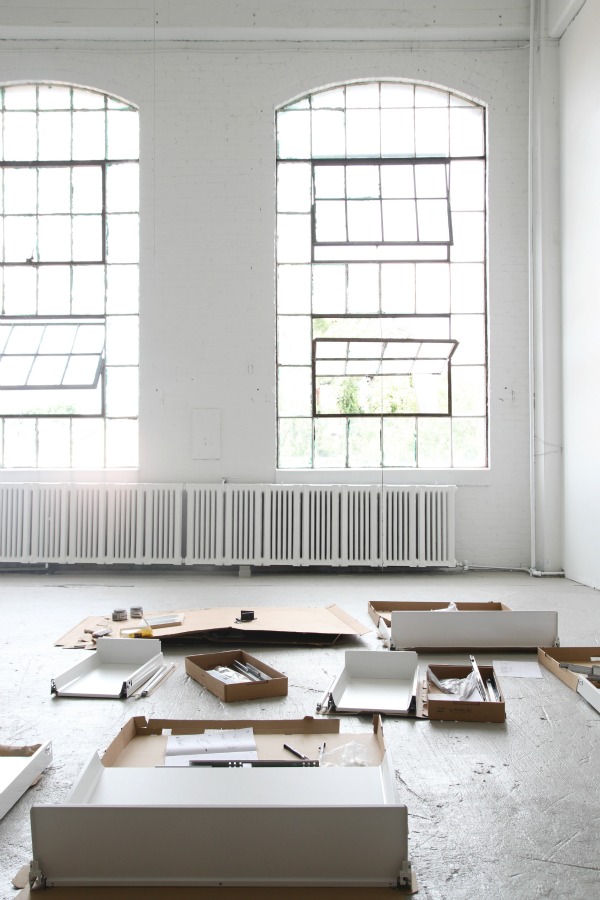
After that, the studio turned into a drawer graveyard. Layne offered to help. Start ’em young! Seriously. It’s so easy even a ten-year-old can do it. We had a drawer building race and he totally beat me.
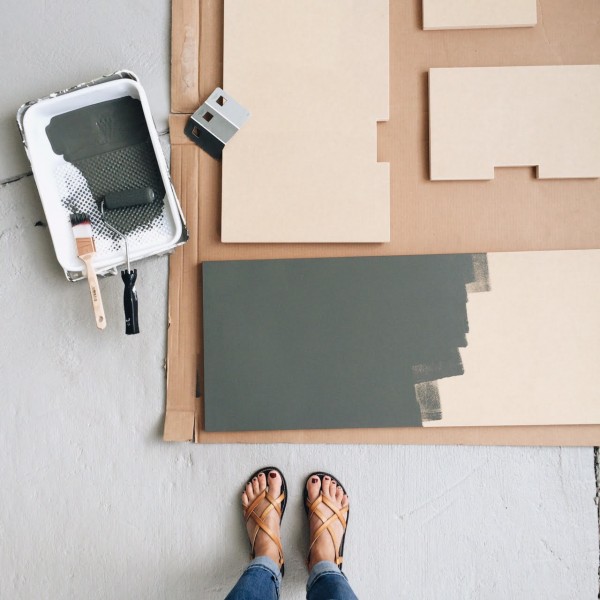
I’d been itching to try Semihandmade for a long time so I ordered seven of the DIY slab drawer fronts with notched pulls and painted them using a 4″ foam roller. The MDF really soaked up the paint. It took three coats of Valspar Reserve latex. The color is Valspar sable evening in a satin finish and it’s one of those chameleon colors. Depending on the light, it can read charcoal or green-gray. I love it.
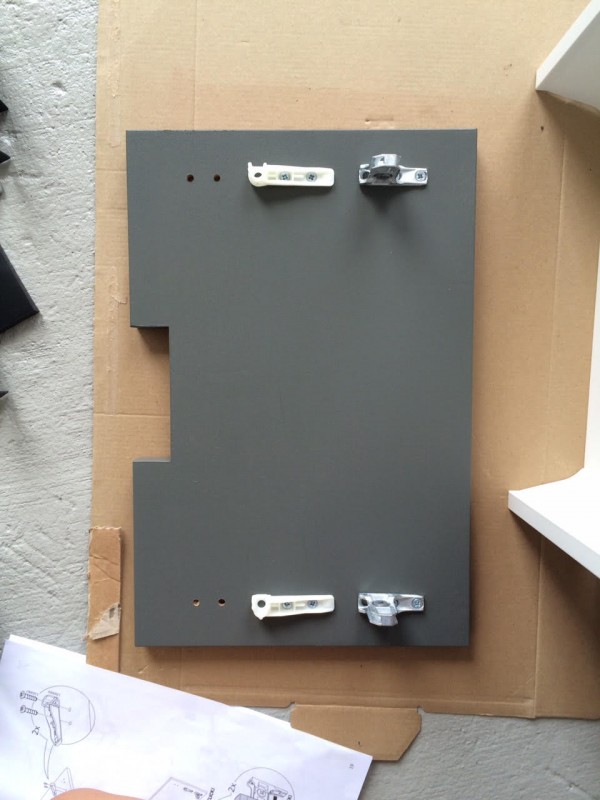
Semihandmade fronts come pre-drilled so I simply screwed the hardware (included with the IKEA drawers) into the proper holes and snapped the fronts onto the drawers.

Voilà! Super easy.
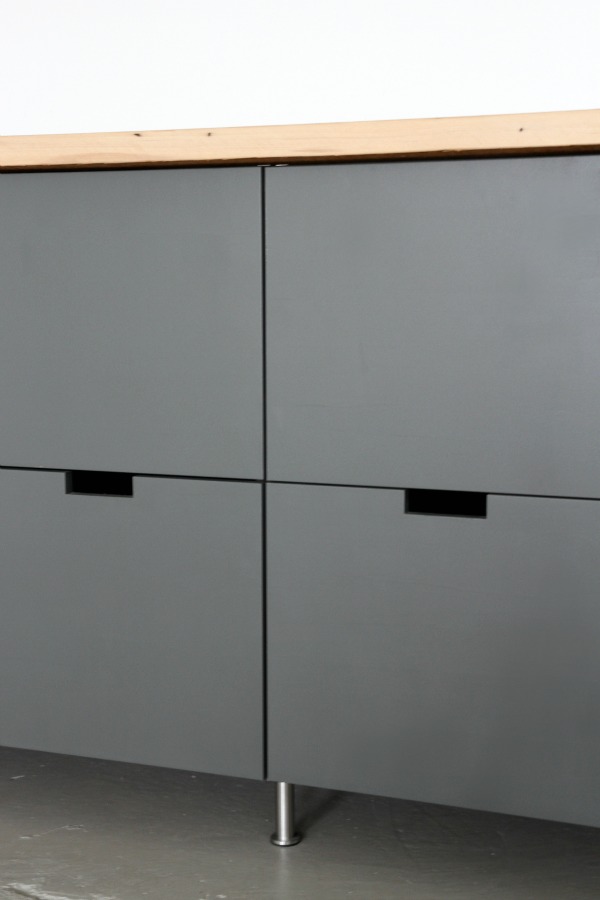
IKEA drawers have special mechanisms on them to tweak the fronts so they line up properly. I didn’t have to adjust them too much. The top drawers open by pulling on their bottoms via the notch below.

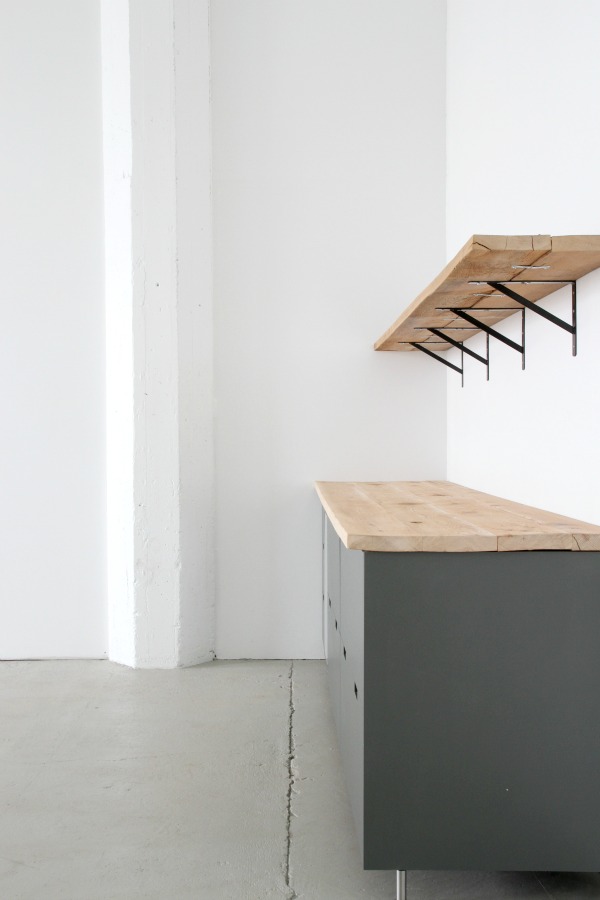
Just as we did for our laundry nook, Steve built a wood top out of boards we found in our attic during renovation. Being the typical engineer, he fretted over the warped boards but I told him not to worry. That’s the beauty of the studio! Nothing has to be perfect! We sanded the wood but left it raw for a rustic look.
Along with the drawer fronts, I also ordered a panel from Semihandmade to cover the exposed side of the end base cabinet. We cut it to size for a custom fit and I painted it the same color as the fronts.
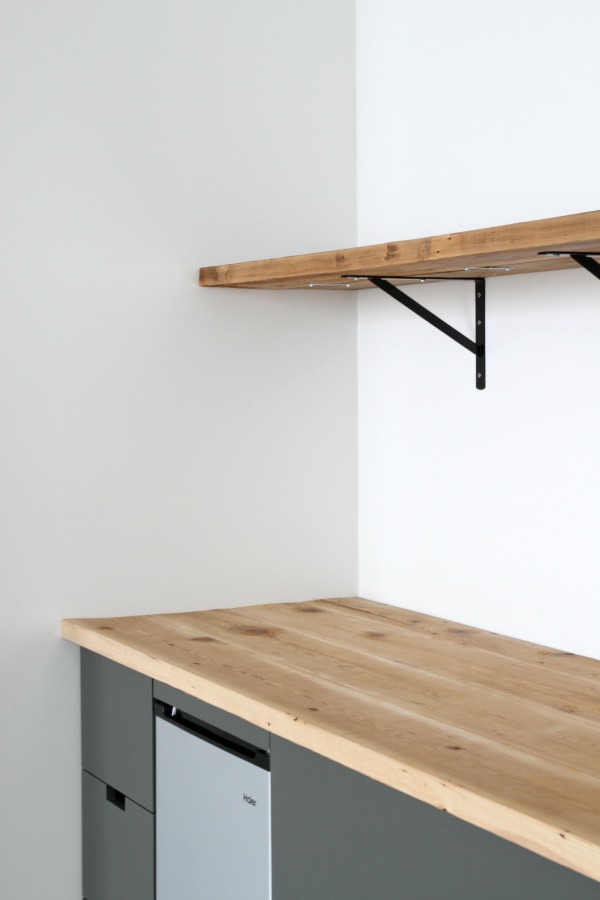
The shelf is made from off-the-shelf brackets and more reclaimed lumber from our attic. Once again, Steve was worried because the wood was warped and the tone of the shelf didn’t match the bench top. I’m like, “It’s free! It doesn’t have to match!” One thing I don’t like is the spacing of the brackets but we didn’t have a choice. We had to tie in to the studs.
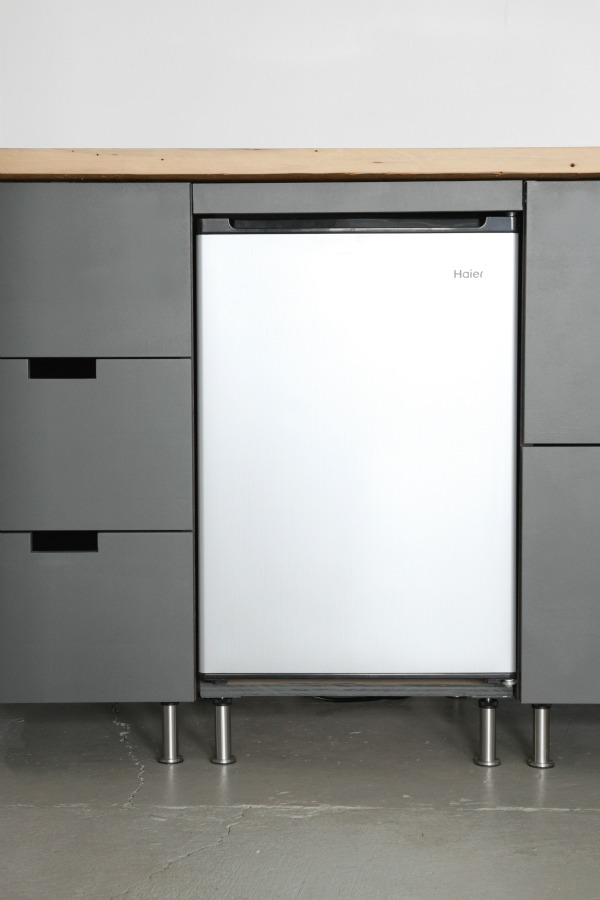
The kids’ favorite part of the studio is the mini fridge. I bought an inexpensive model and Steve made a platform using leftover plywood and IKEA legs to level it with the cabinets. Then he cut a piece of filler from scraps of the Semihandmade side panel to fill in the gap at the top. I painted everything to match.

Overall, I’m super happy with how the dry bar came together. I’m impressed with the Semihandmade fronts. They have more weight to them than IKEA fronts and I like that there are more options for customization. I should note that the notched pulls are no longer an option. The notches had to be cut by hand and creating them became dangerous and time-consuming. I love the clean, modern look of the notches but reaching down to open the top drawers does feel a little awkward. If I were putting these fronts in my house, I would probably spray them or have them professionally sprayed for a perfect finish. The foam roller worked great but I would be pickier about the finish in a real kitchen.
I’ve had experience building cabinets from both the IKEA AKURUM and SEKTION lines and, in my opinion, the current SEKTION line has better hardware when it comes to assembly and stability. A few things that were plastic in the AKURUM line are now metal in the SEKTION line. I don’t know if or how that will effect longevity but it’s a difference I noticed.
I know this setup probably isn’t feasible for a house (um, no sink) but my hope is, even though I’m putting my spin on a workspace, someone out there might find something that translates to a living space. If you’ve been considering Semihandmade for a project (they do IKEA wardrobes and bathroom vanities too!) then you might want to check out entry details for the giveaway below. Hint, hint.
PRIZE: one $500 credit to Semihandmade (Offer is not redeemable for cash.)
RULES: You must be at least 18 years old and have a shipping address (no P.O. boxes please) within the continental U.S. or Canada. One entry per email address.
TO ENTER: Leave a comment on this post proclaiming “SEMI ME!” Double your odds by liking this Instagram post.
DEADLINE: Enter before 9:00 p.m. EST on Sunday, December 20th. One random winner will be announced Monday, December 21st.
WHILE YOU’RE AT IT: Share what project you would tackle with the prize money. New kitchen? Bedroom wardrobe for clothing organization? Bathroom makeover? So many possibilities!
Good luck!
images: Dana Miller for House*Tweaking
Article Source: Ikea Cabinets in the Studio (+ a Giveaway from Semihandmade!)
No comments:
Post a Comment